Fly zips can be very tricky to insert and can end up really messy.
There are so many different methods available, but I find this method gives me good results. It really is just a matter of steps and doing each in the correct order.
I practiced this method a couple of times before I went anywhere near my good fabric. If I’ve not sewn pants for a while, I will whizz up a sample with a piece of leftover fabric.
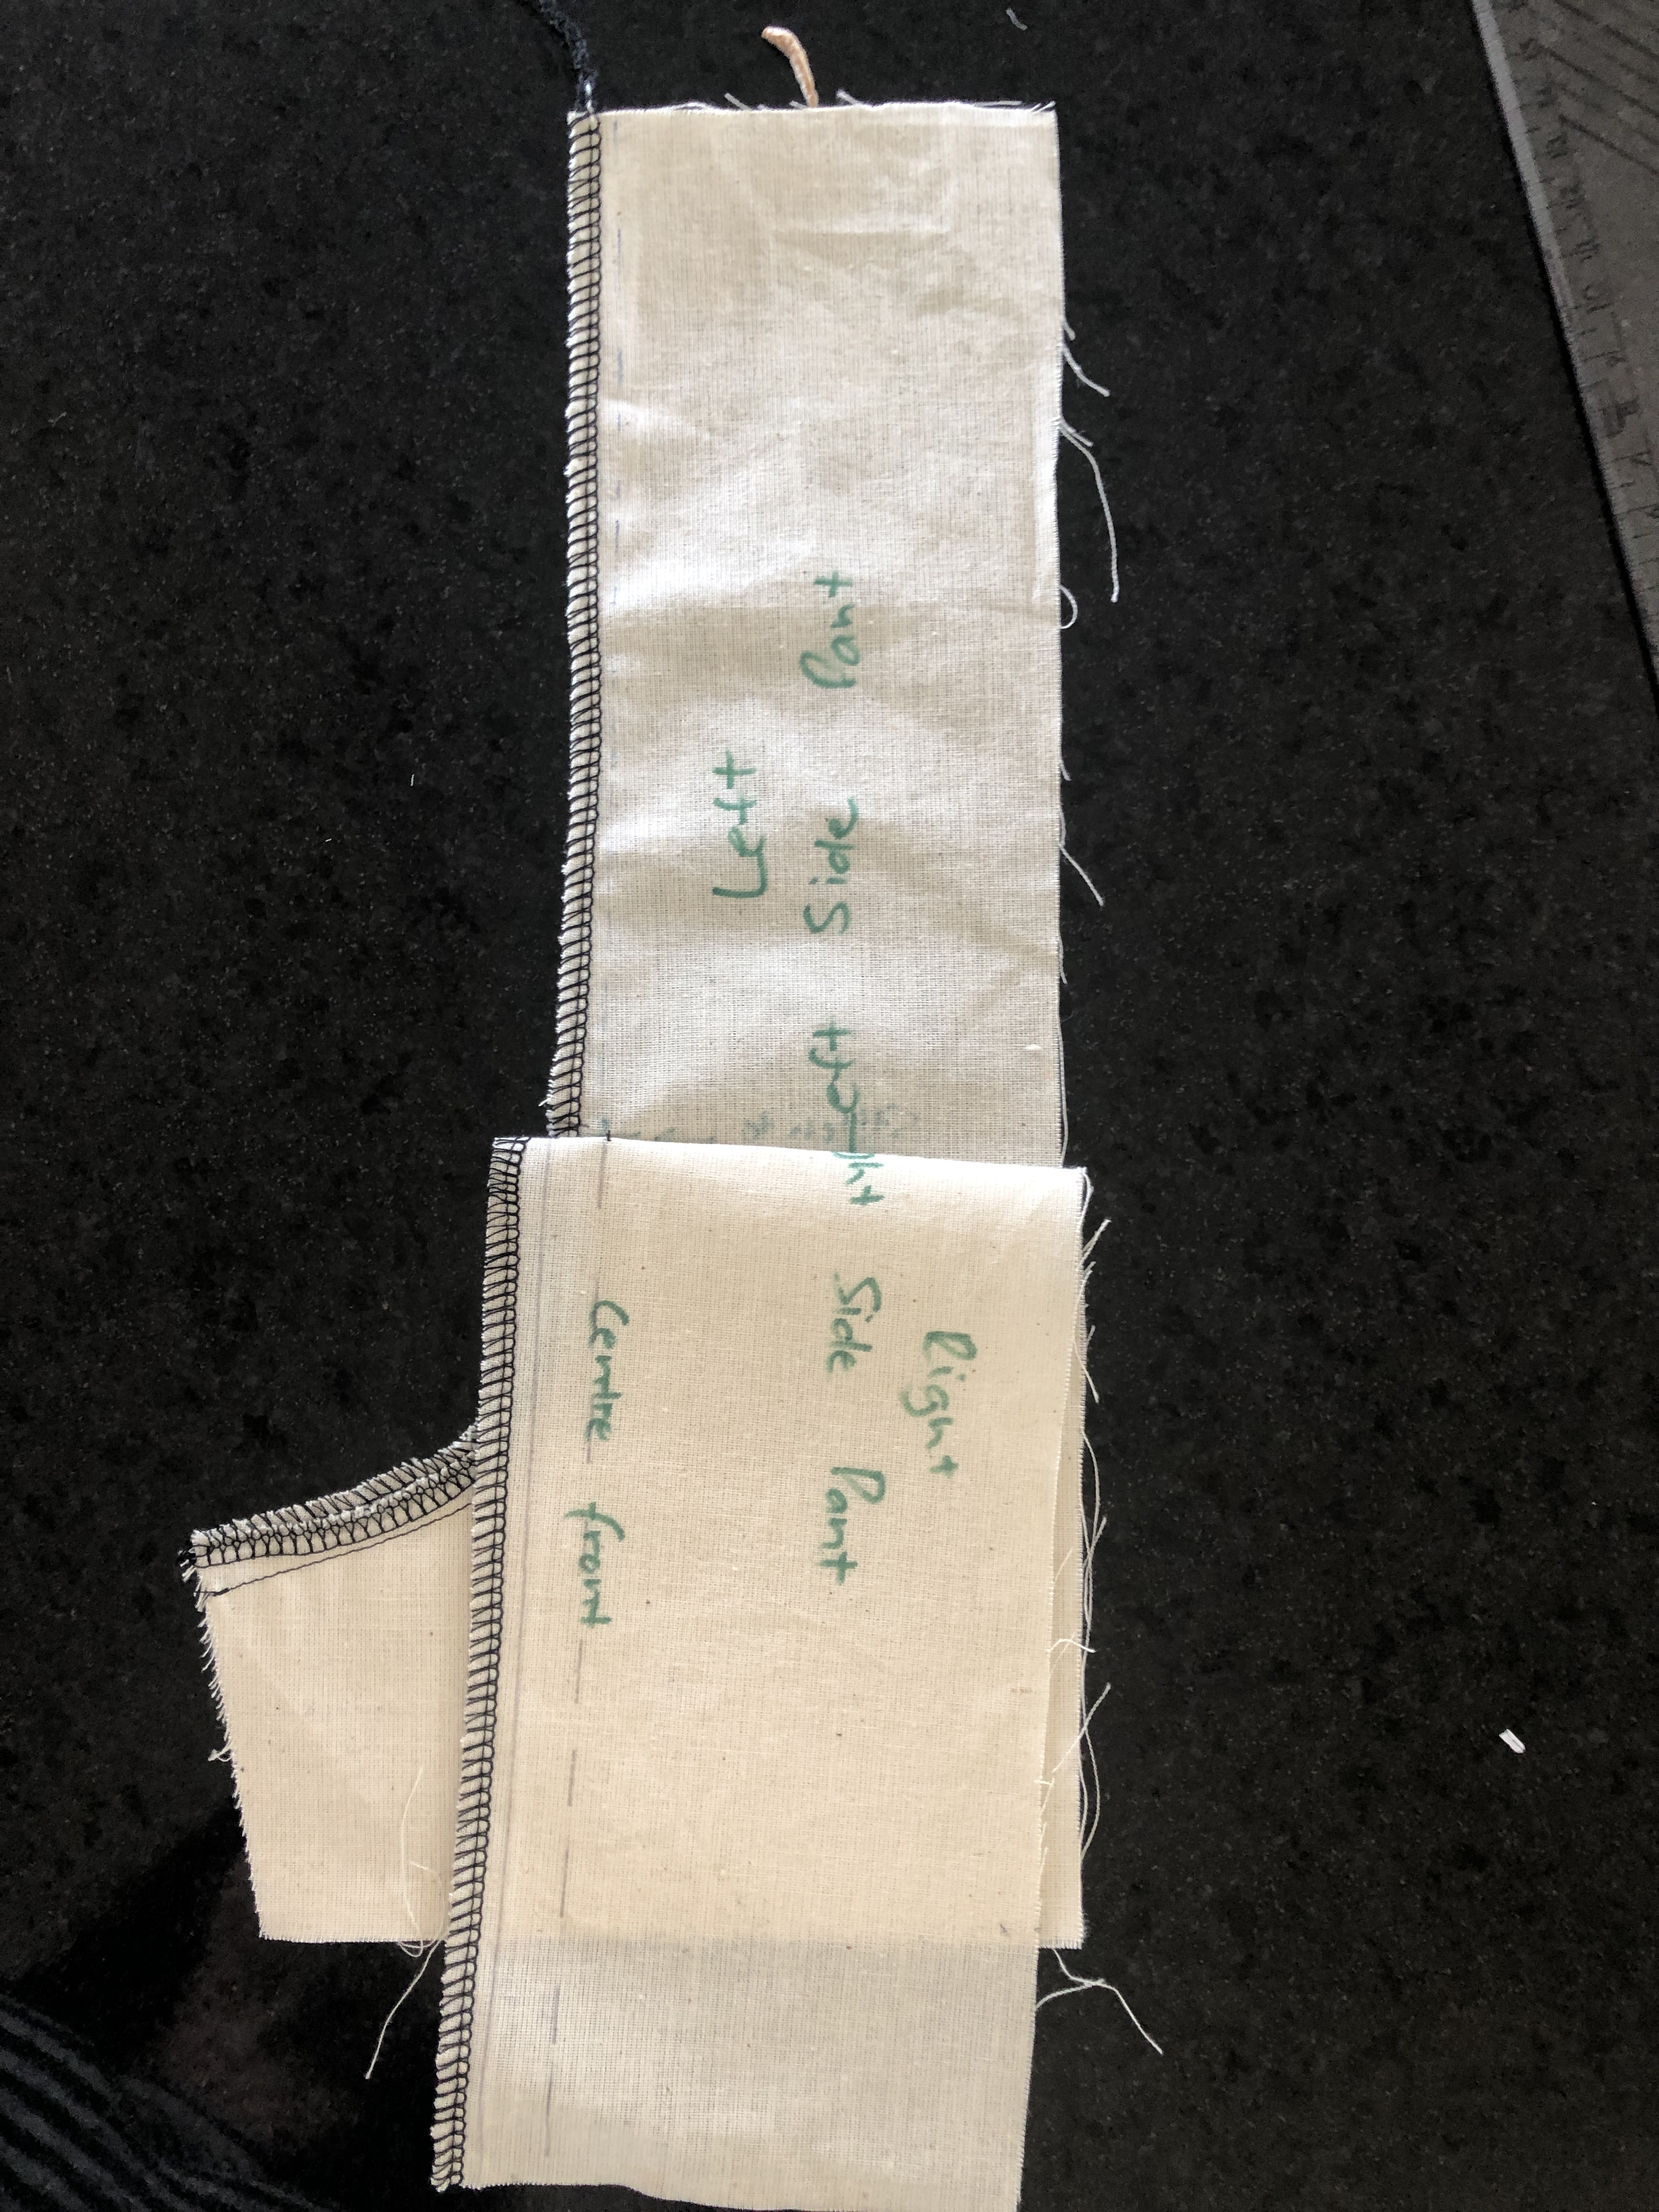
It really is personal preference as to what side the fly zip opening sits. The below is sewn with the opening on the right.
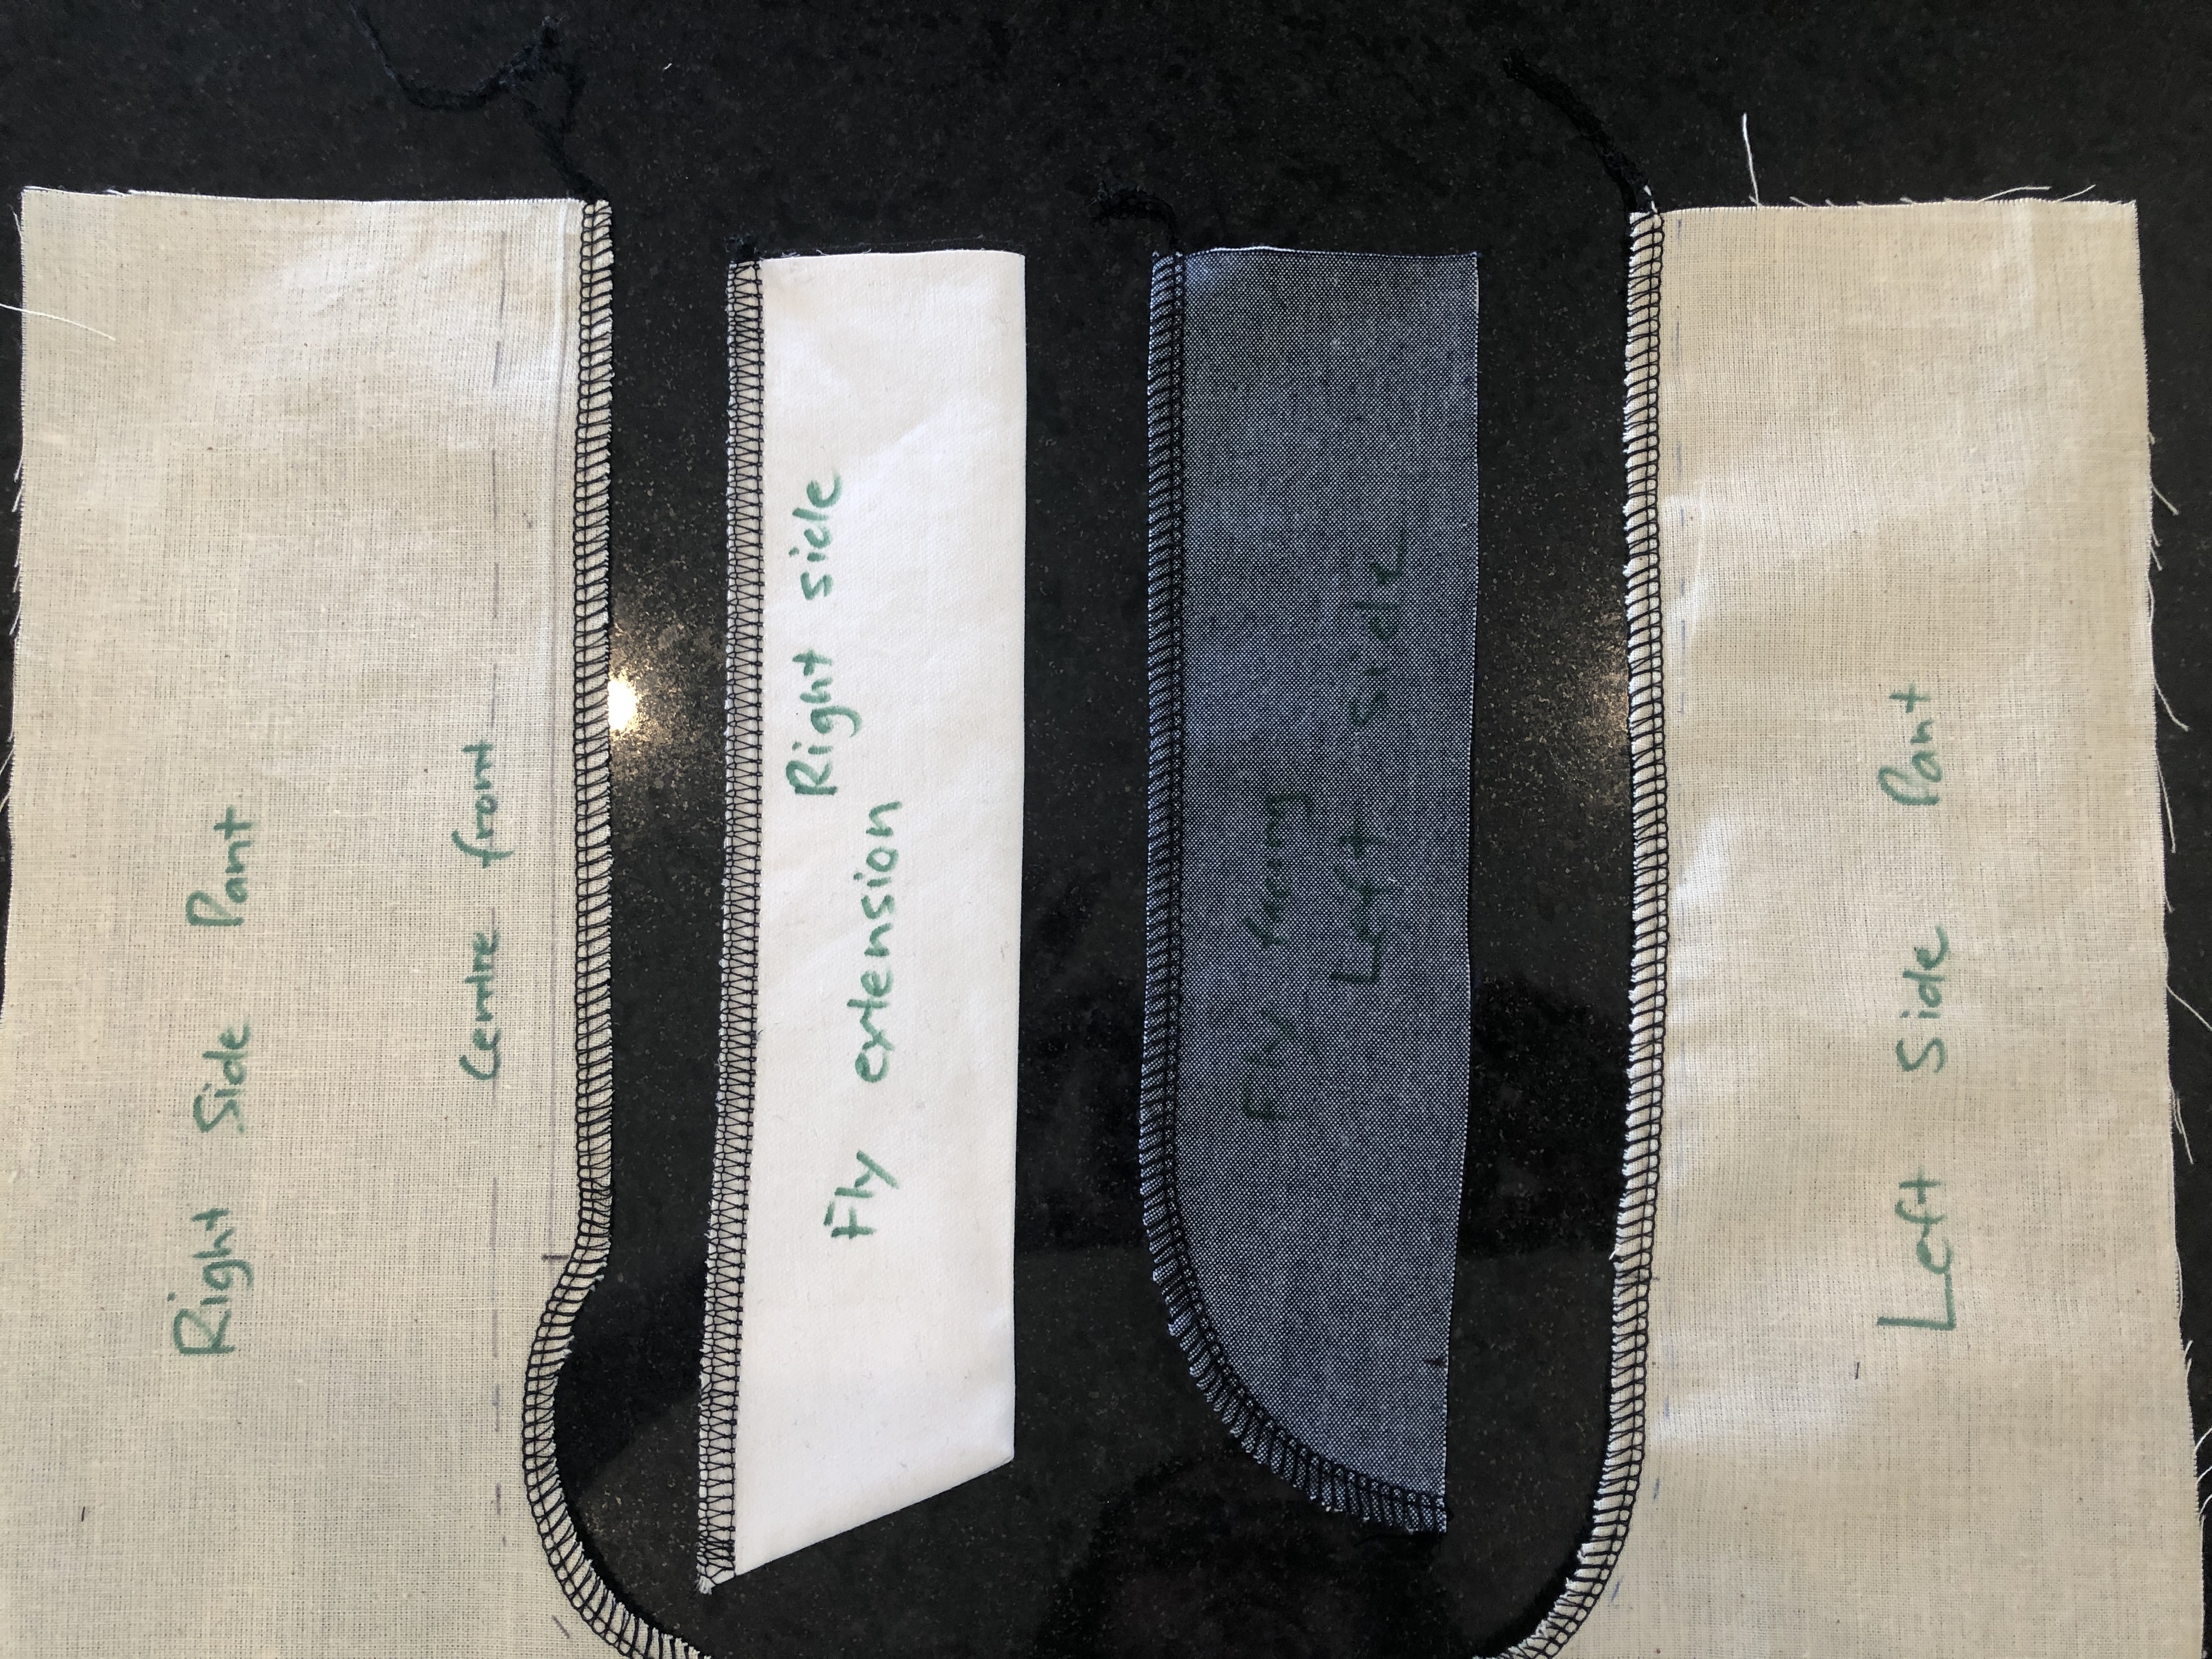
Some home sewing patterns use a grown on fly facing, again this is personal preference and not really used in RTW.
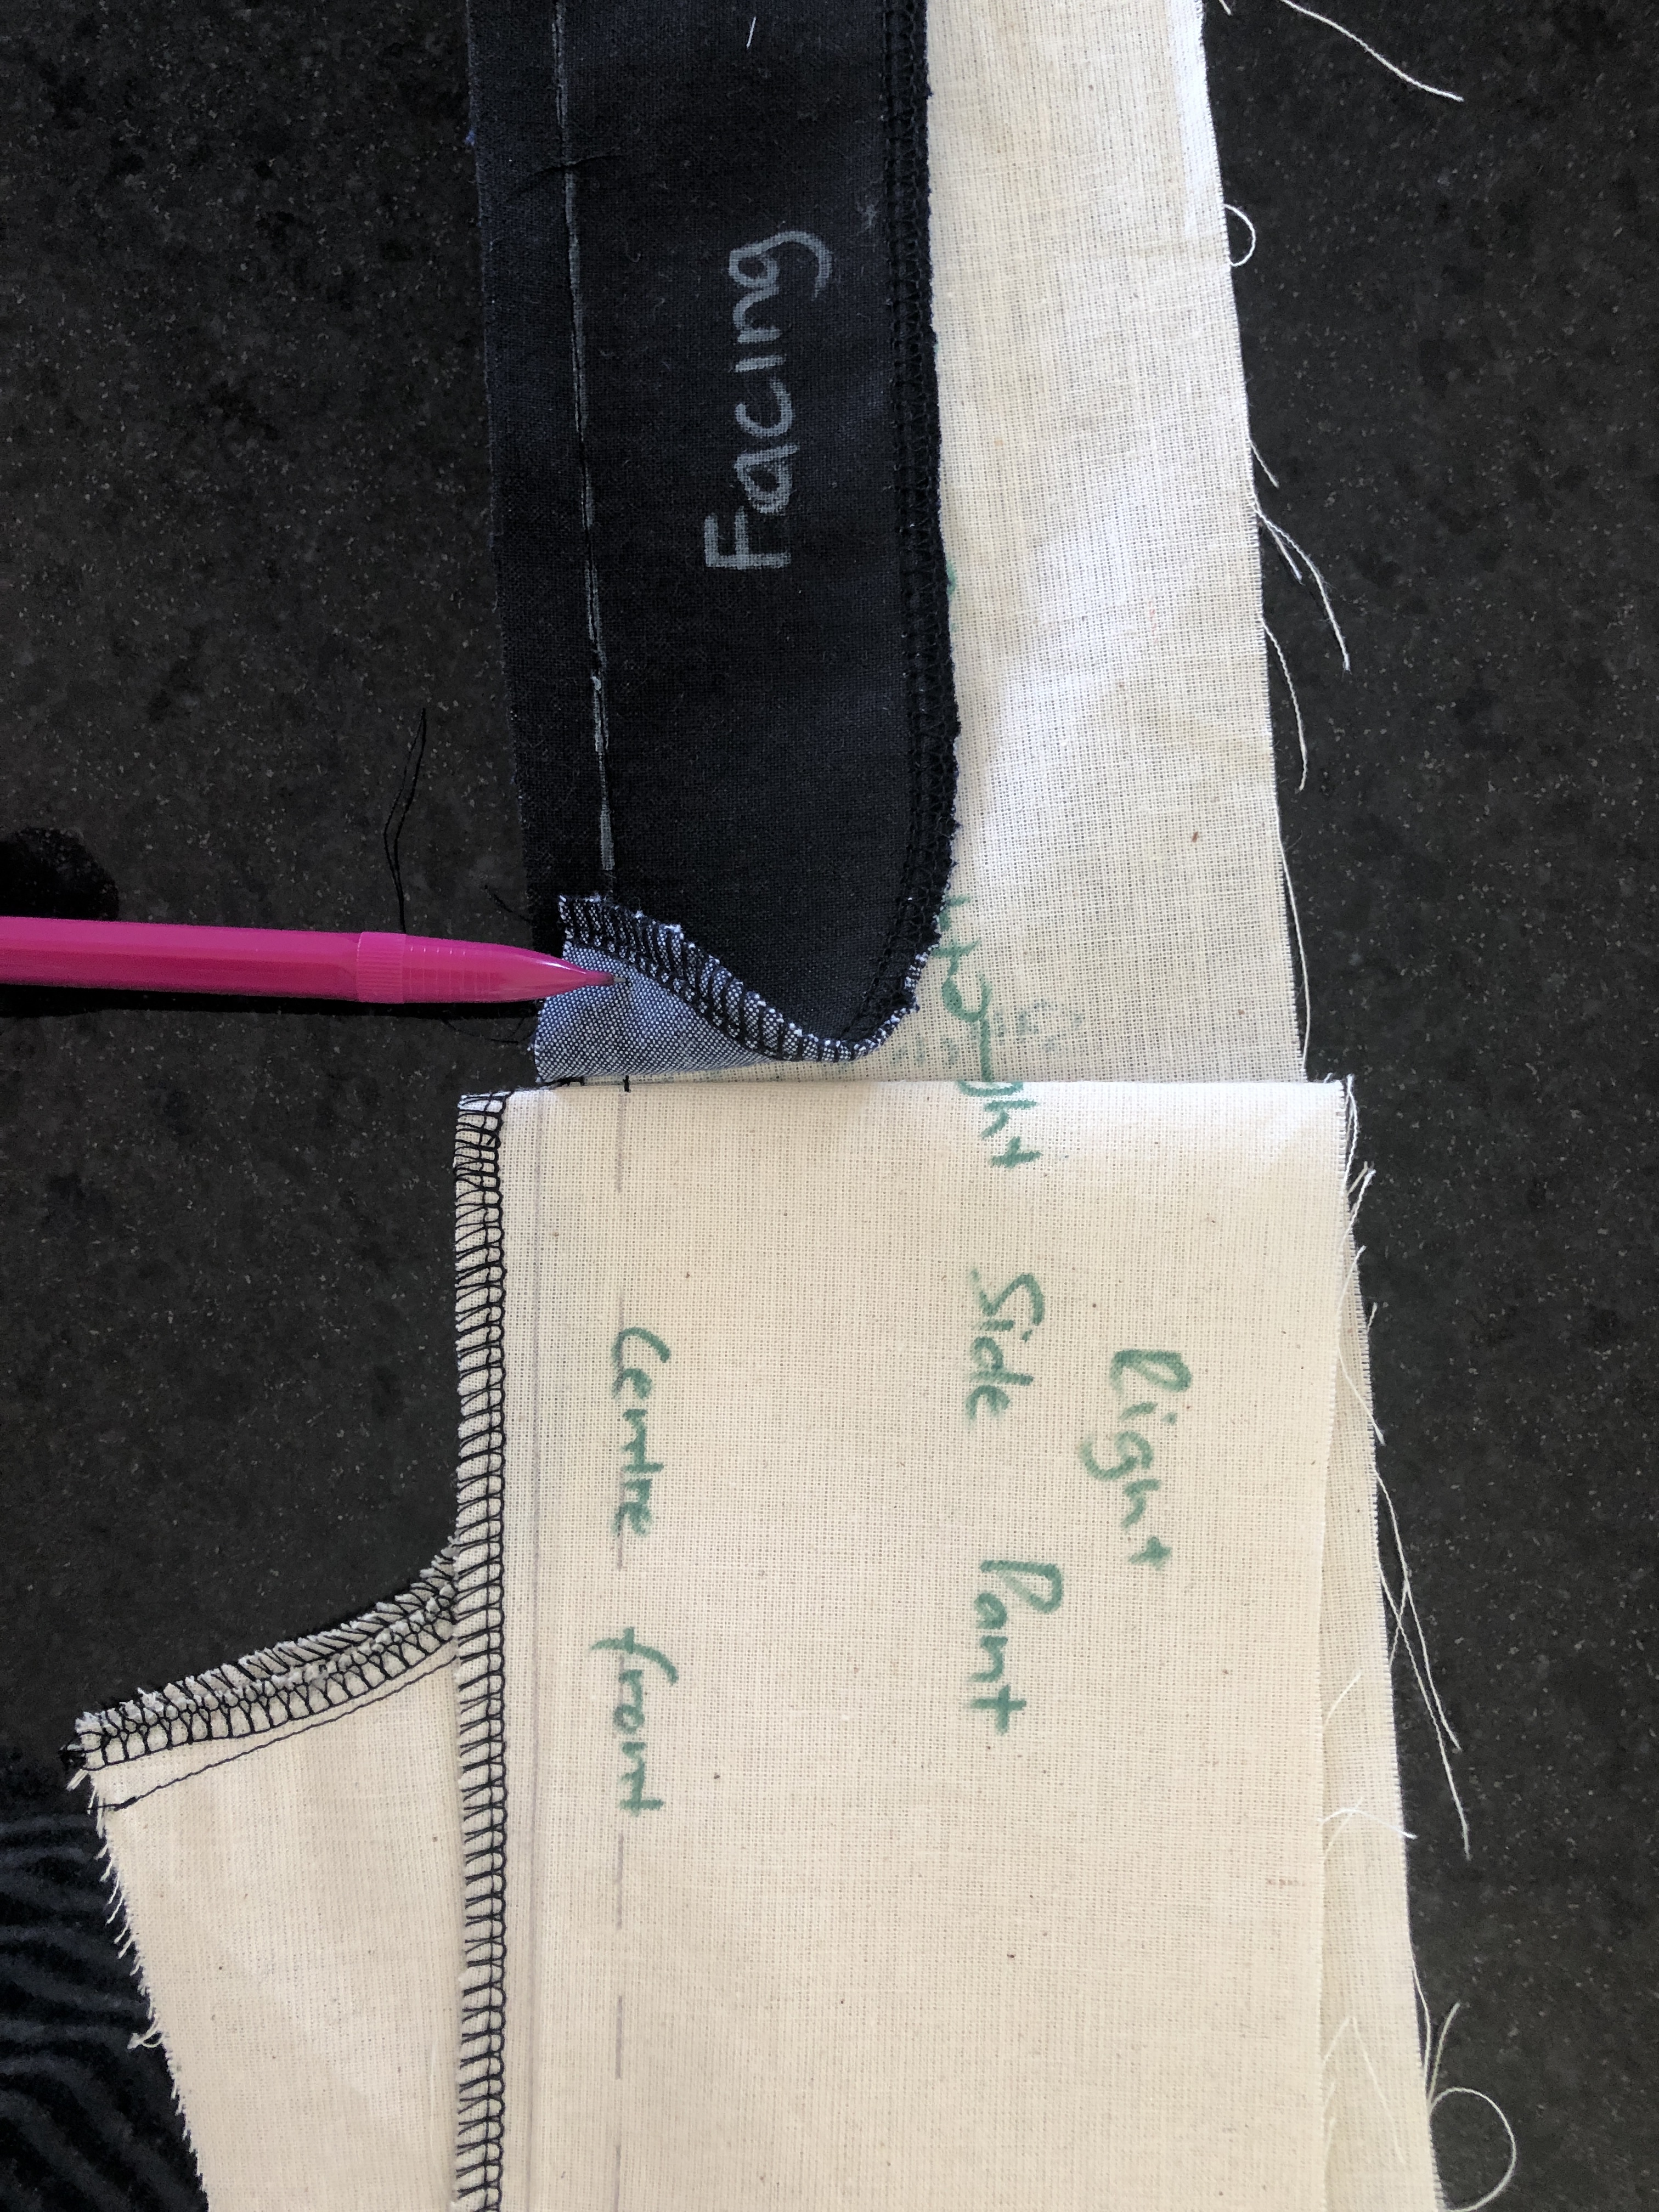
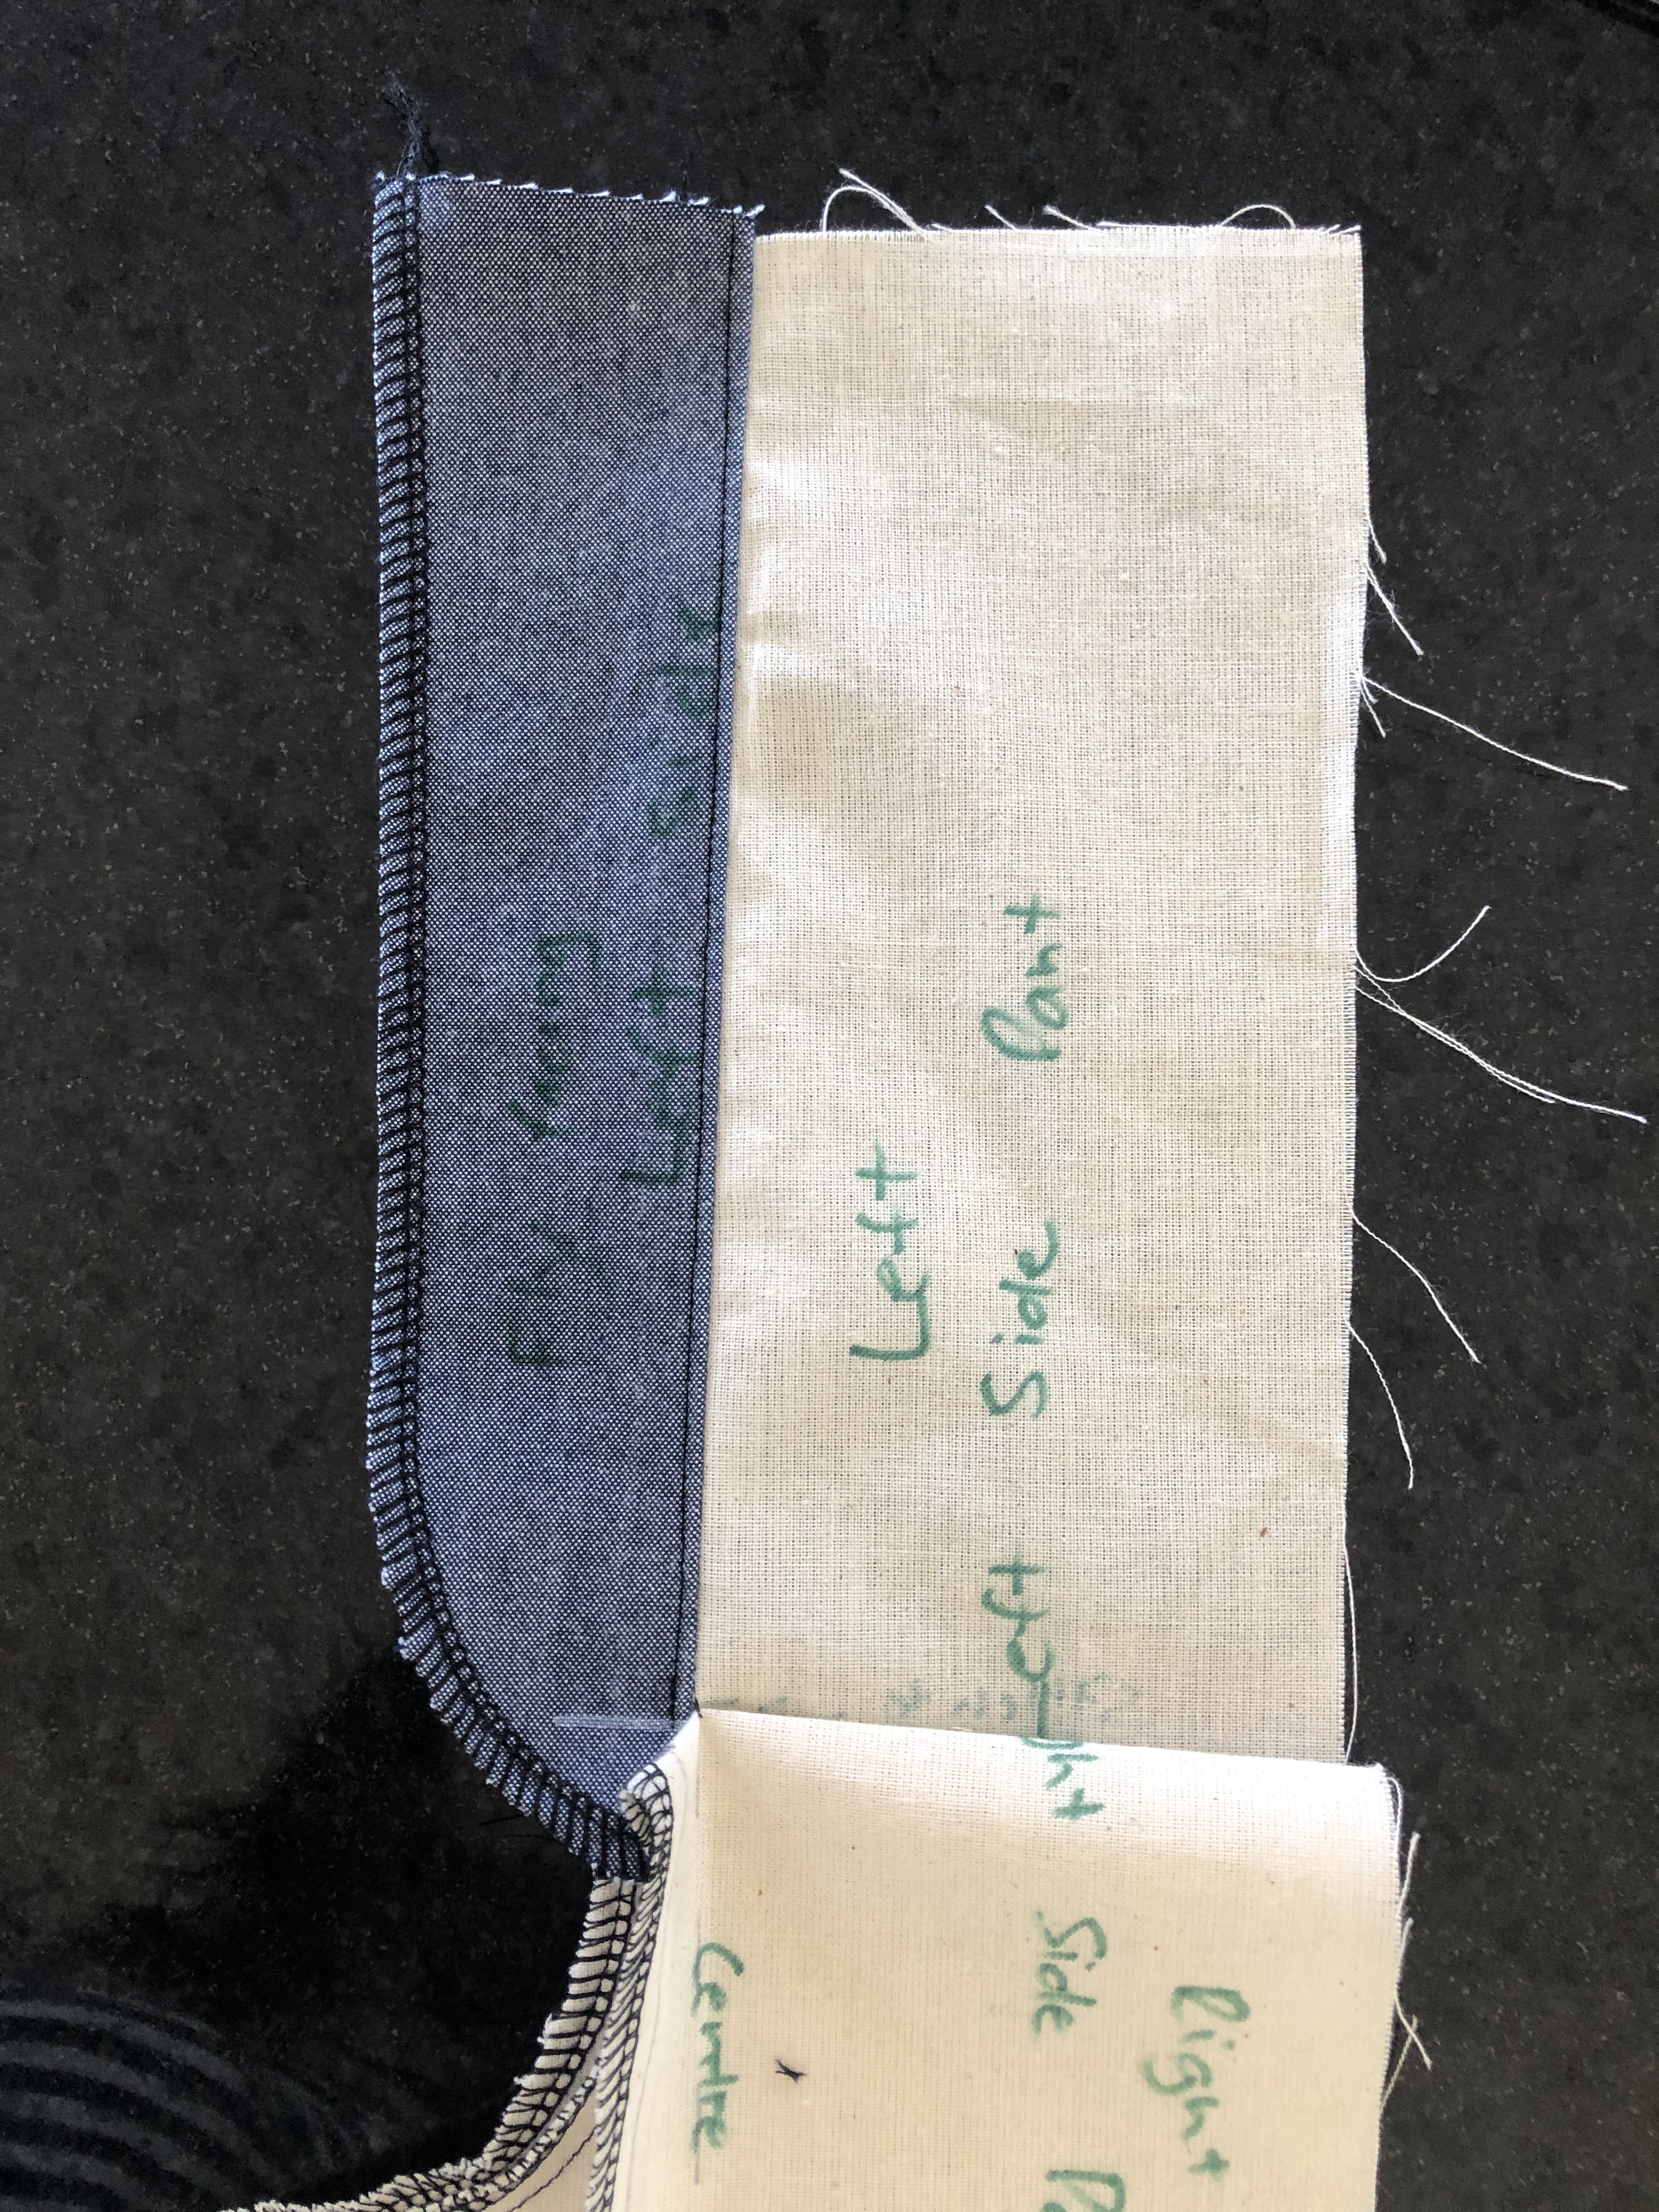
Fold the fly extension in half and I bag out the lower edge. Have a look at a ready to wear pant if available. It’s always nice to investigate how garments are finished and we all want a professional looking garment. Binding can be used on the fly extension edge as well (mine above is overlocked) These seam finishes can be added once your confidence grows.
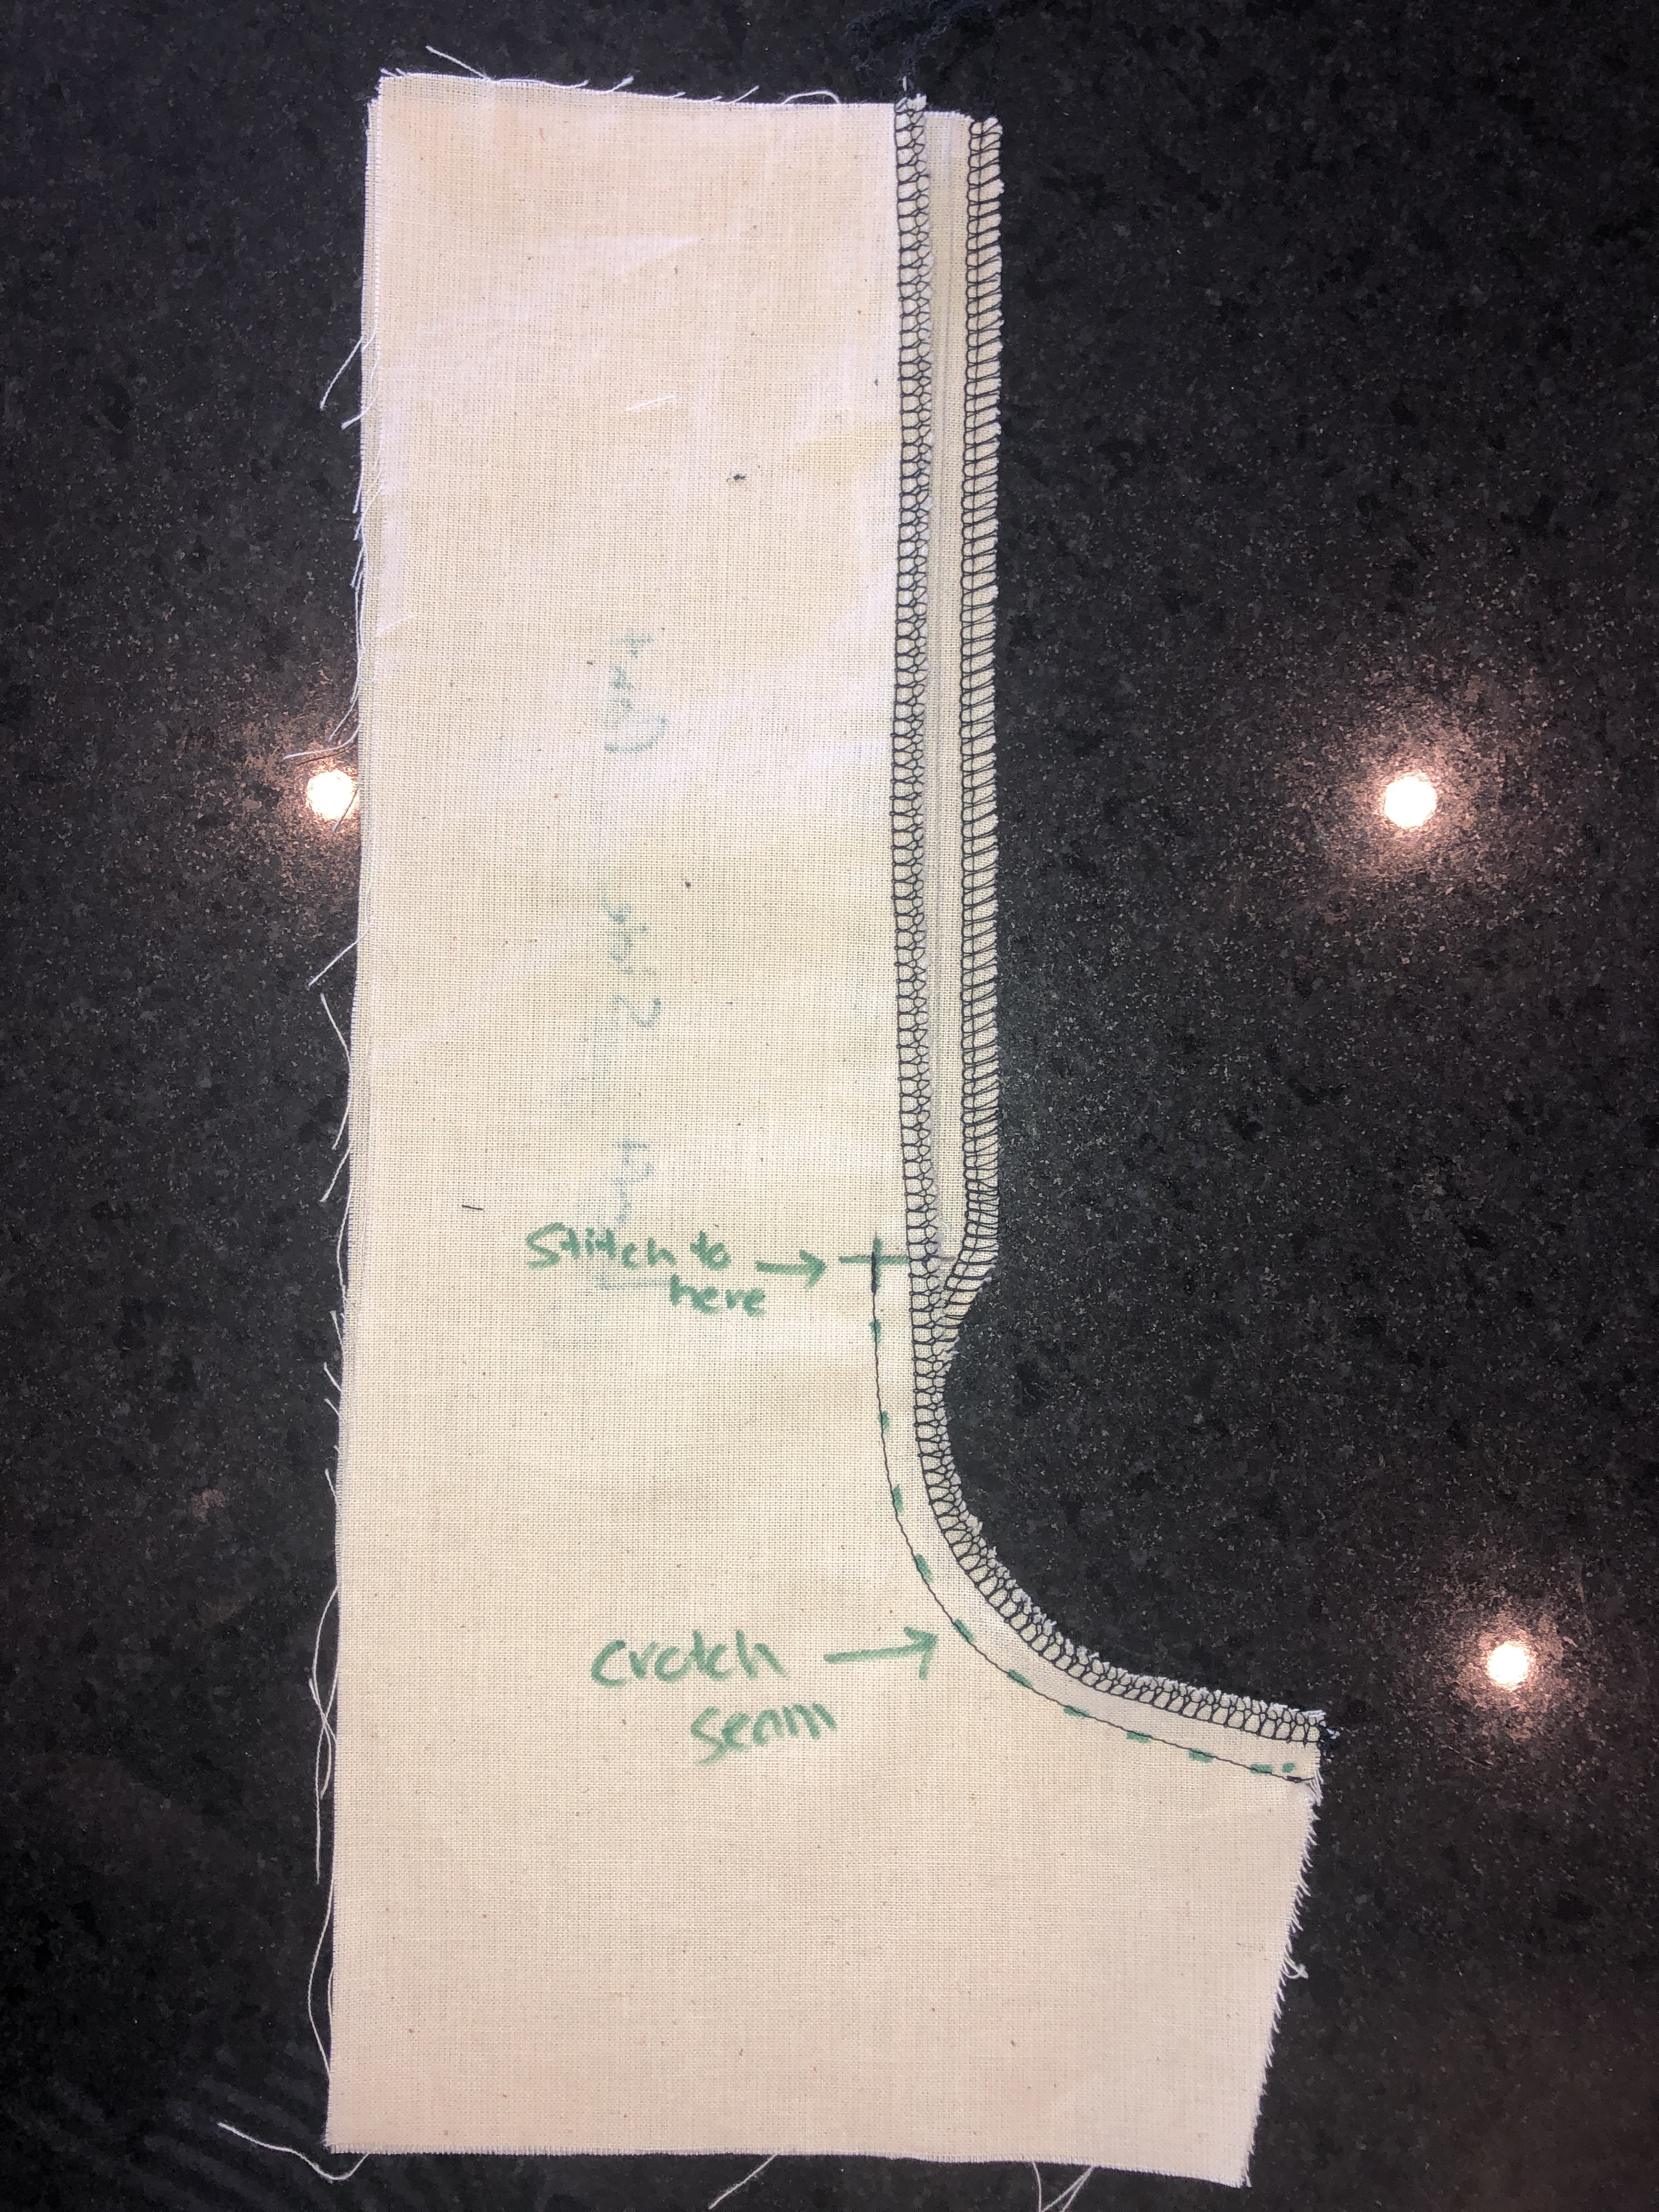
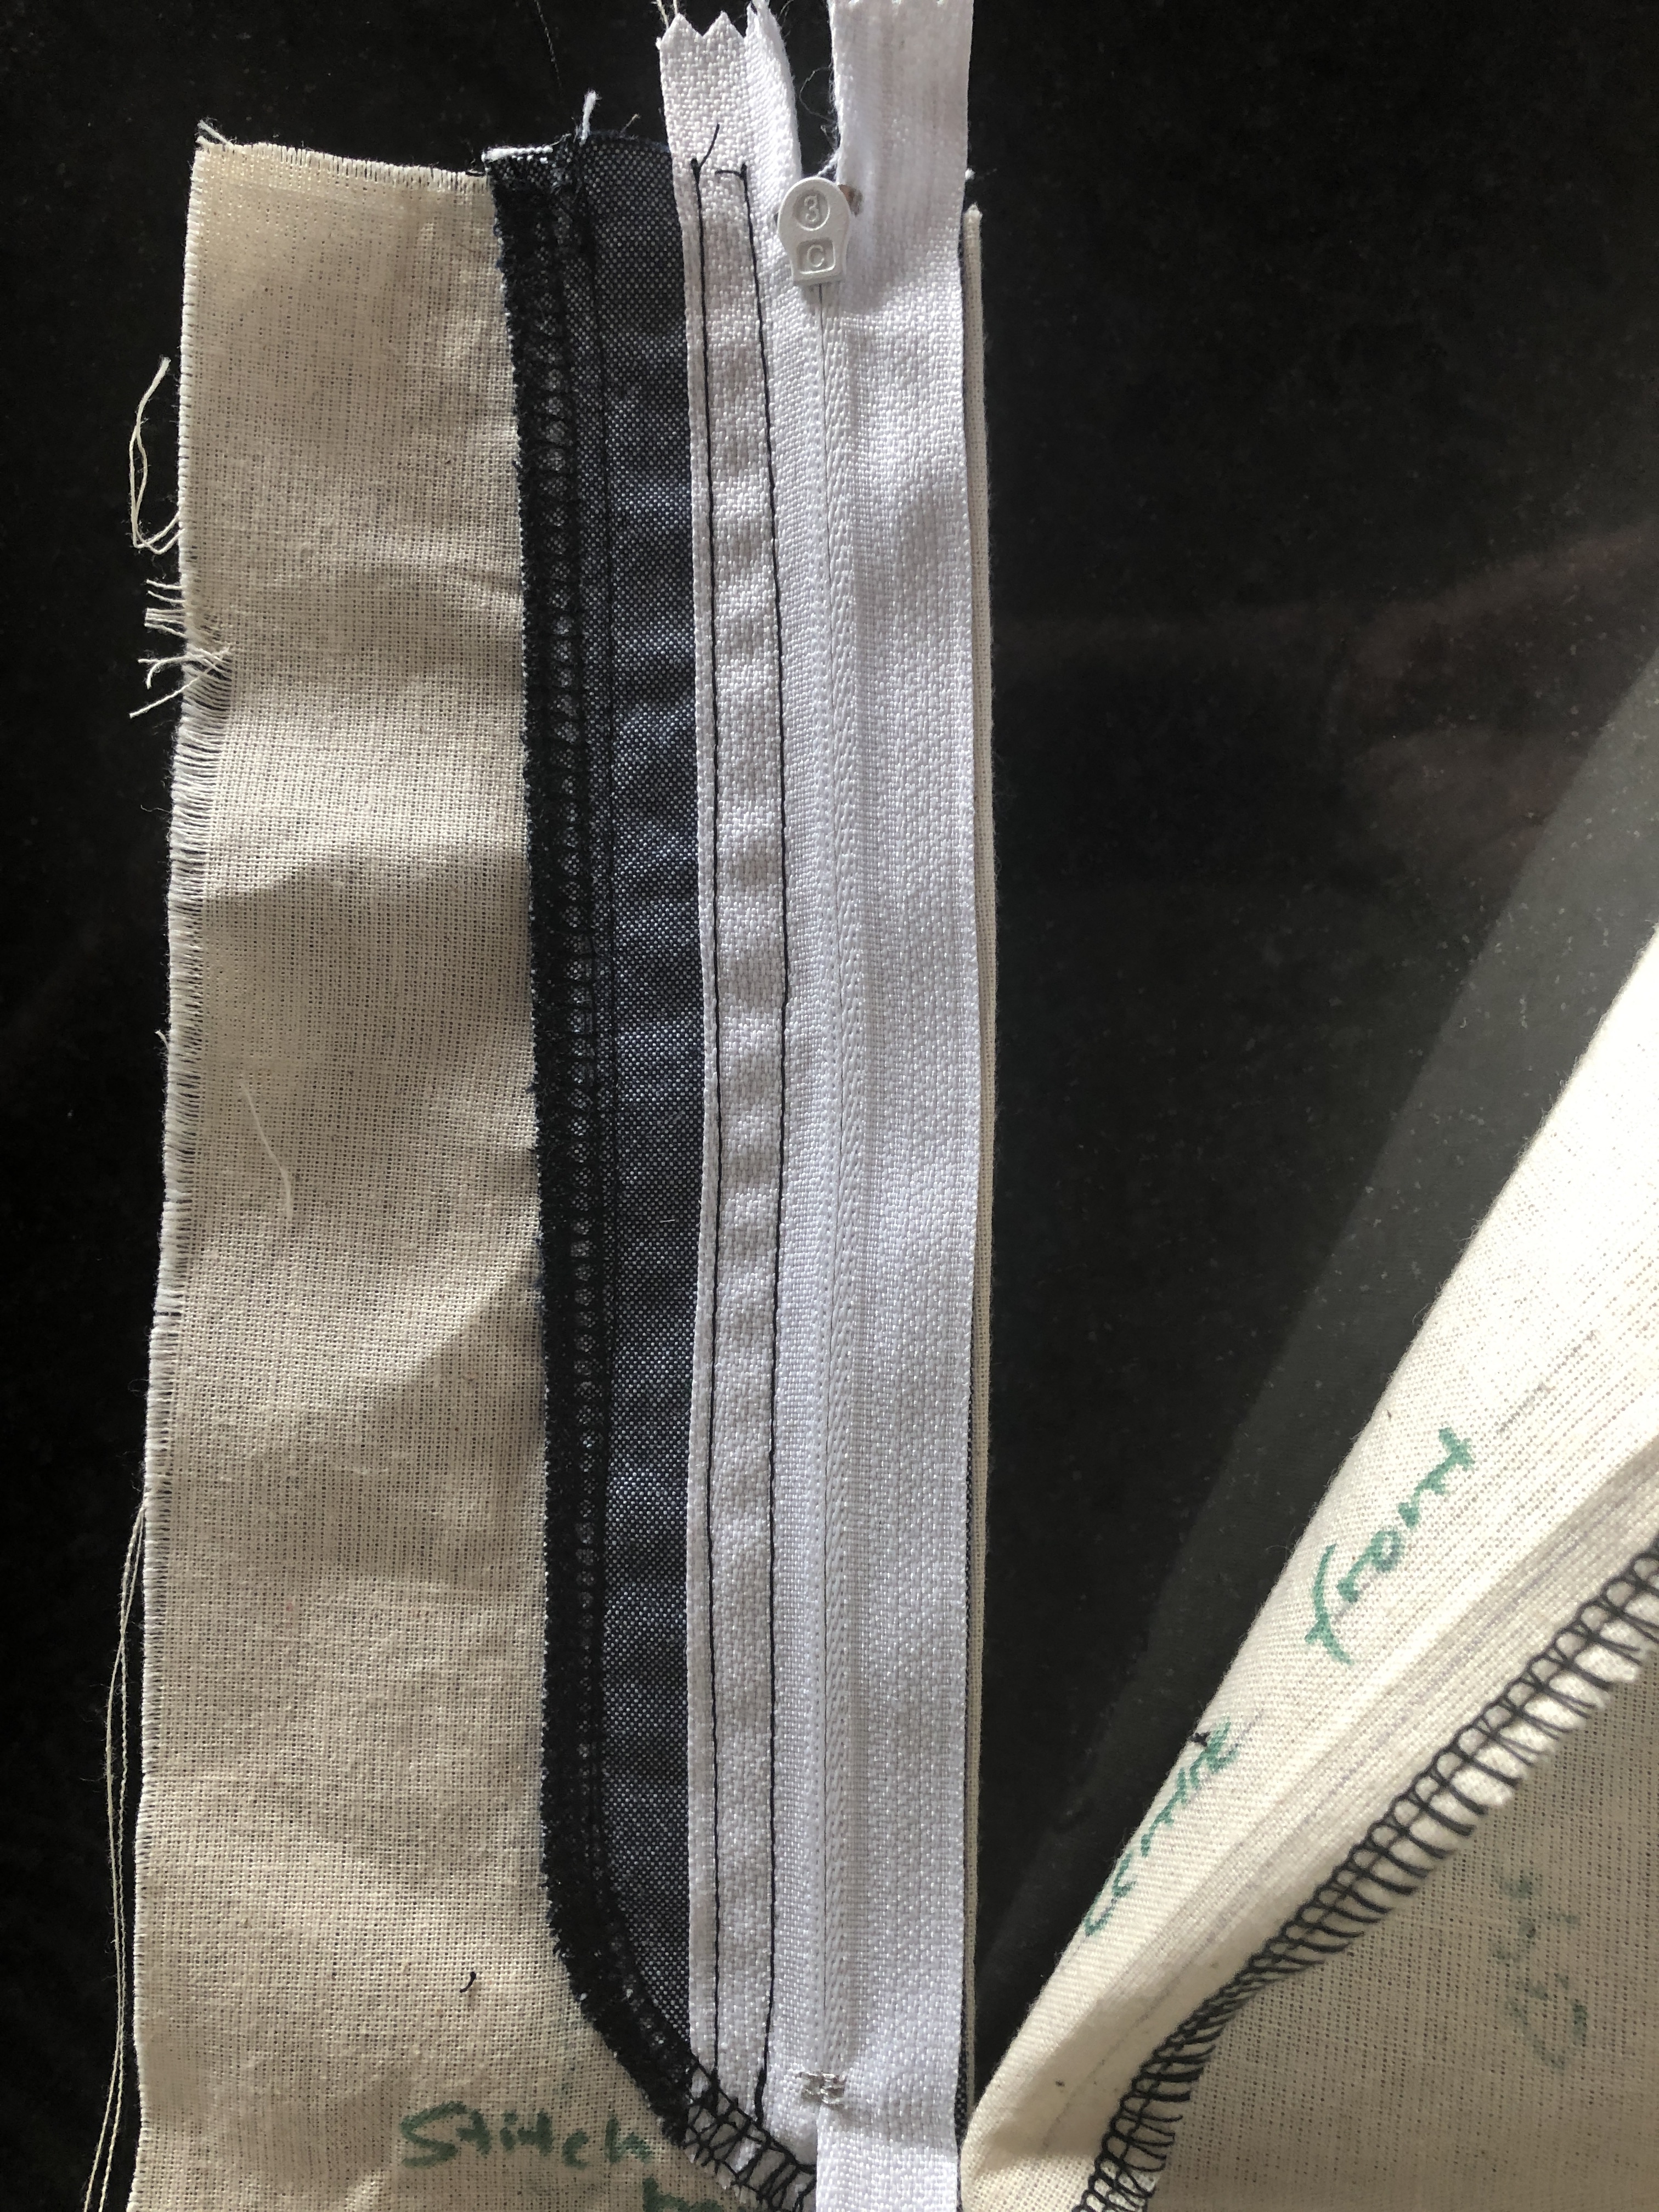
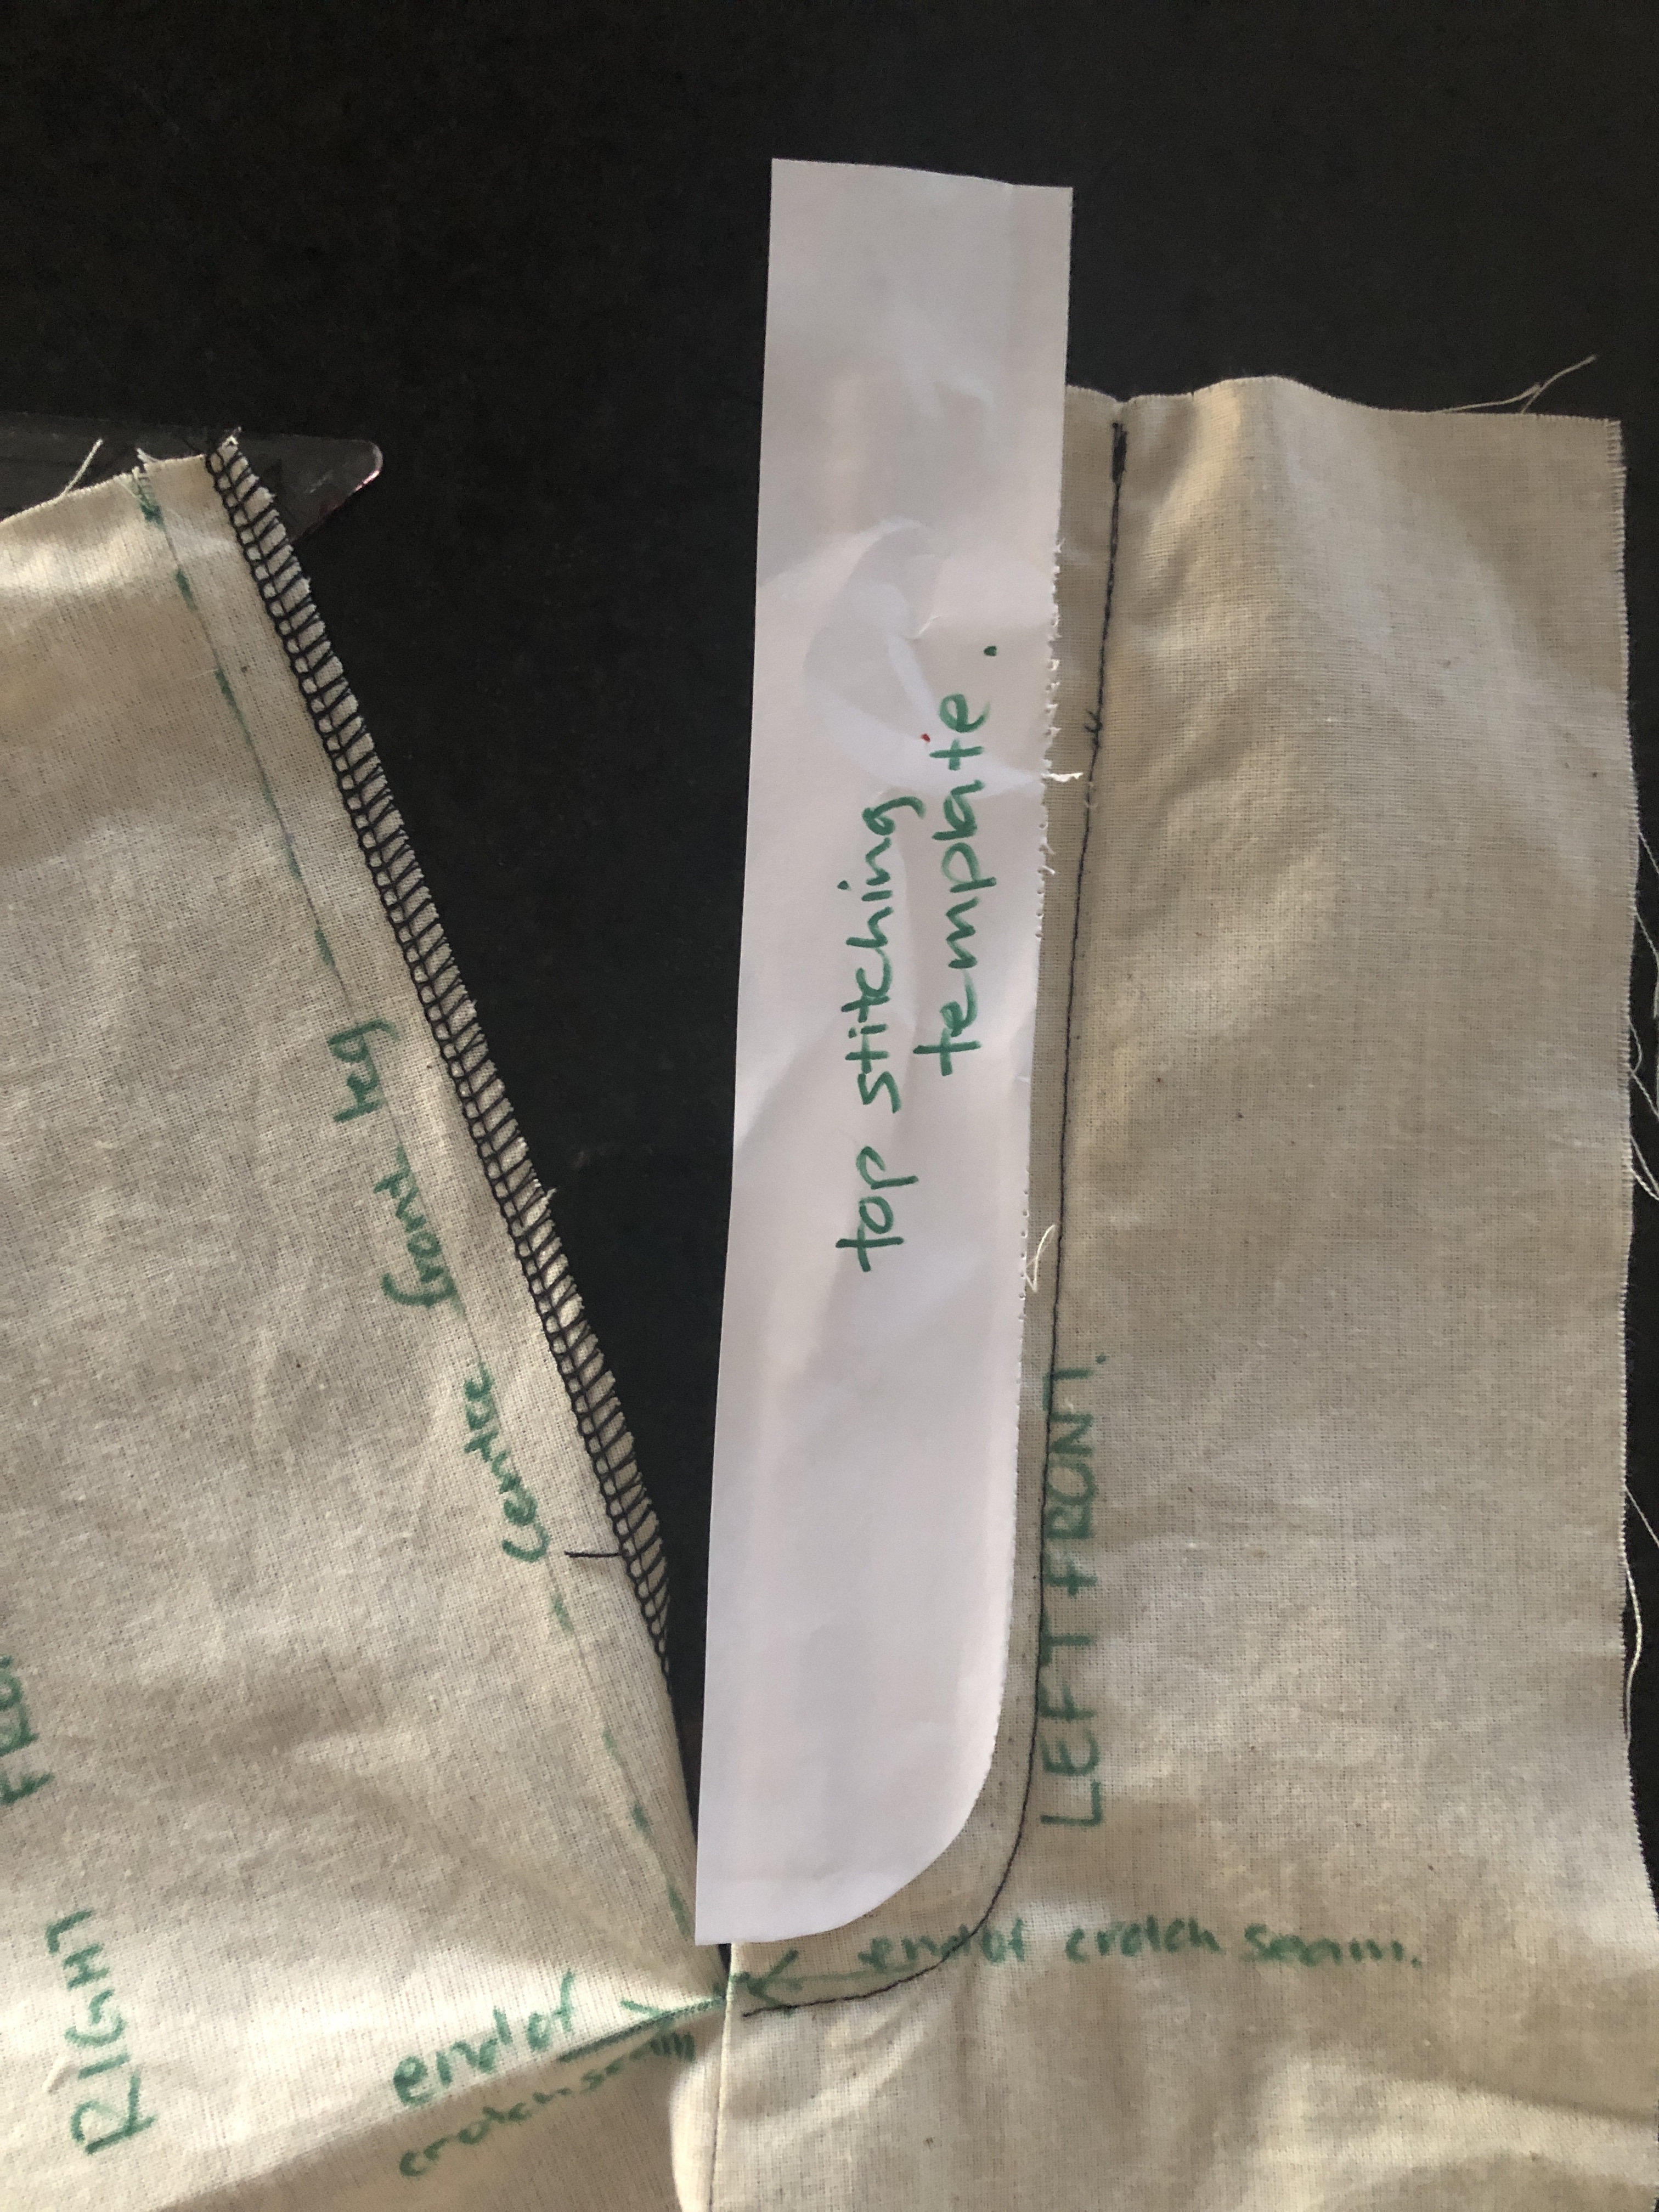
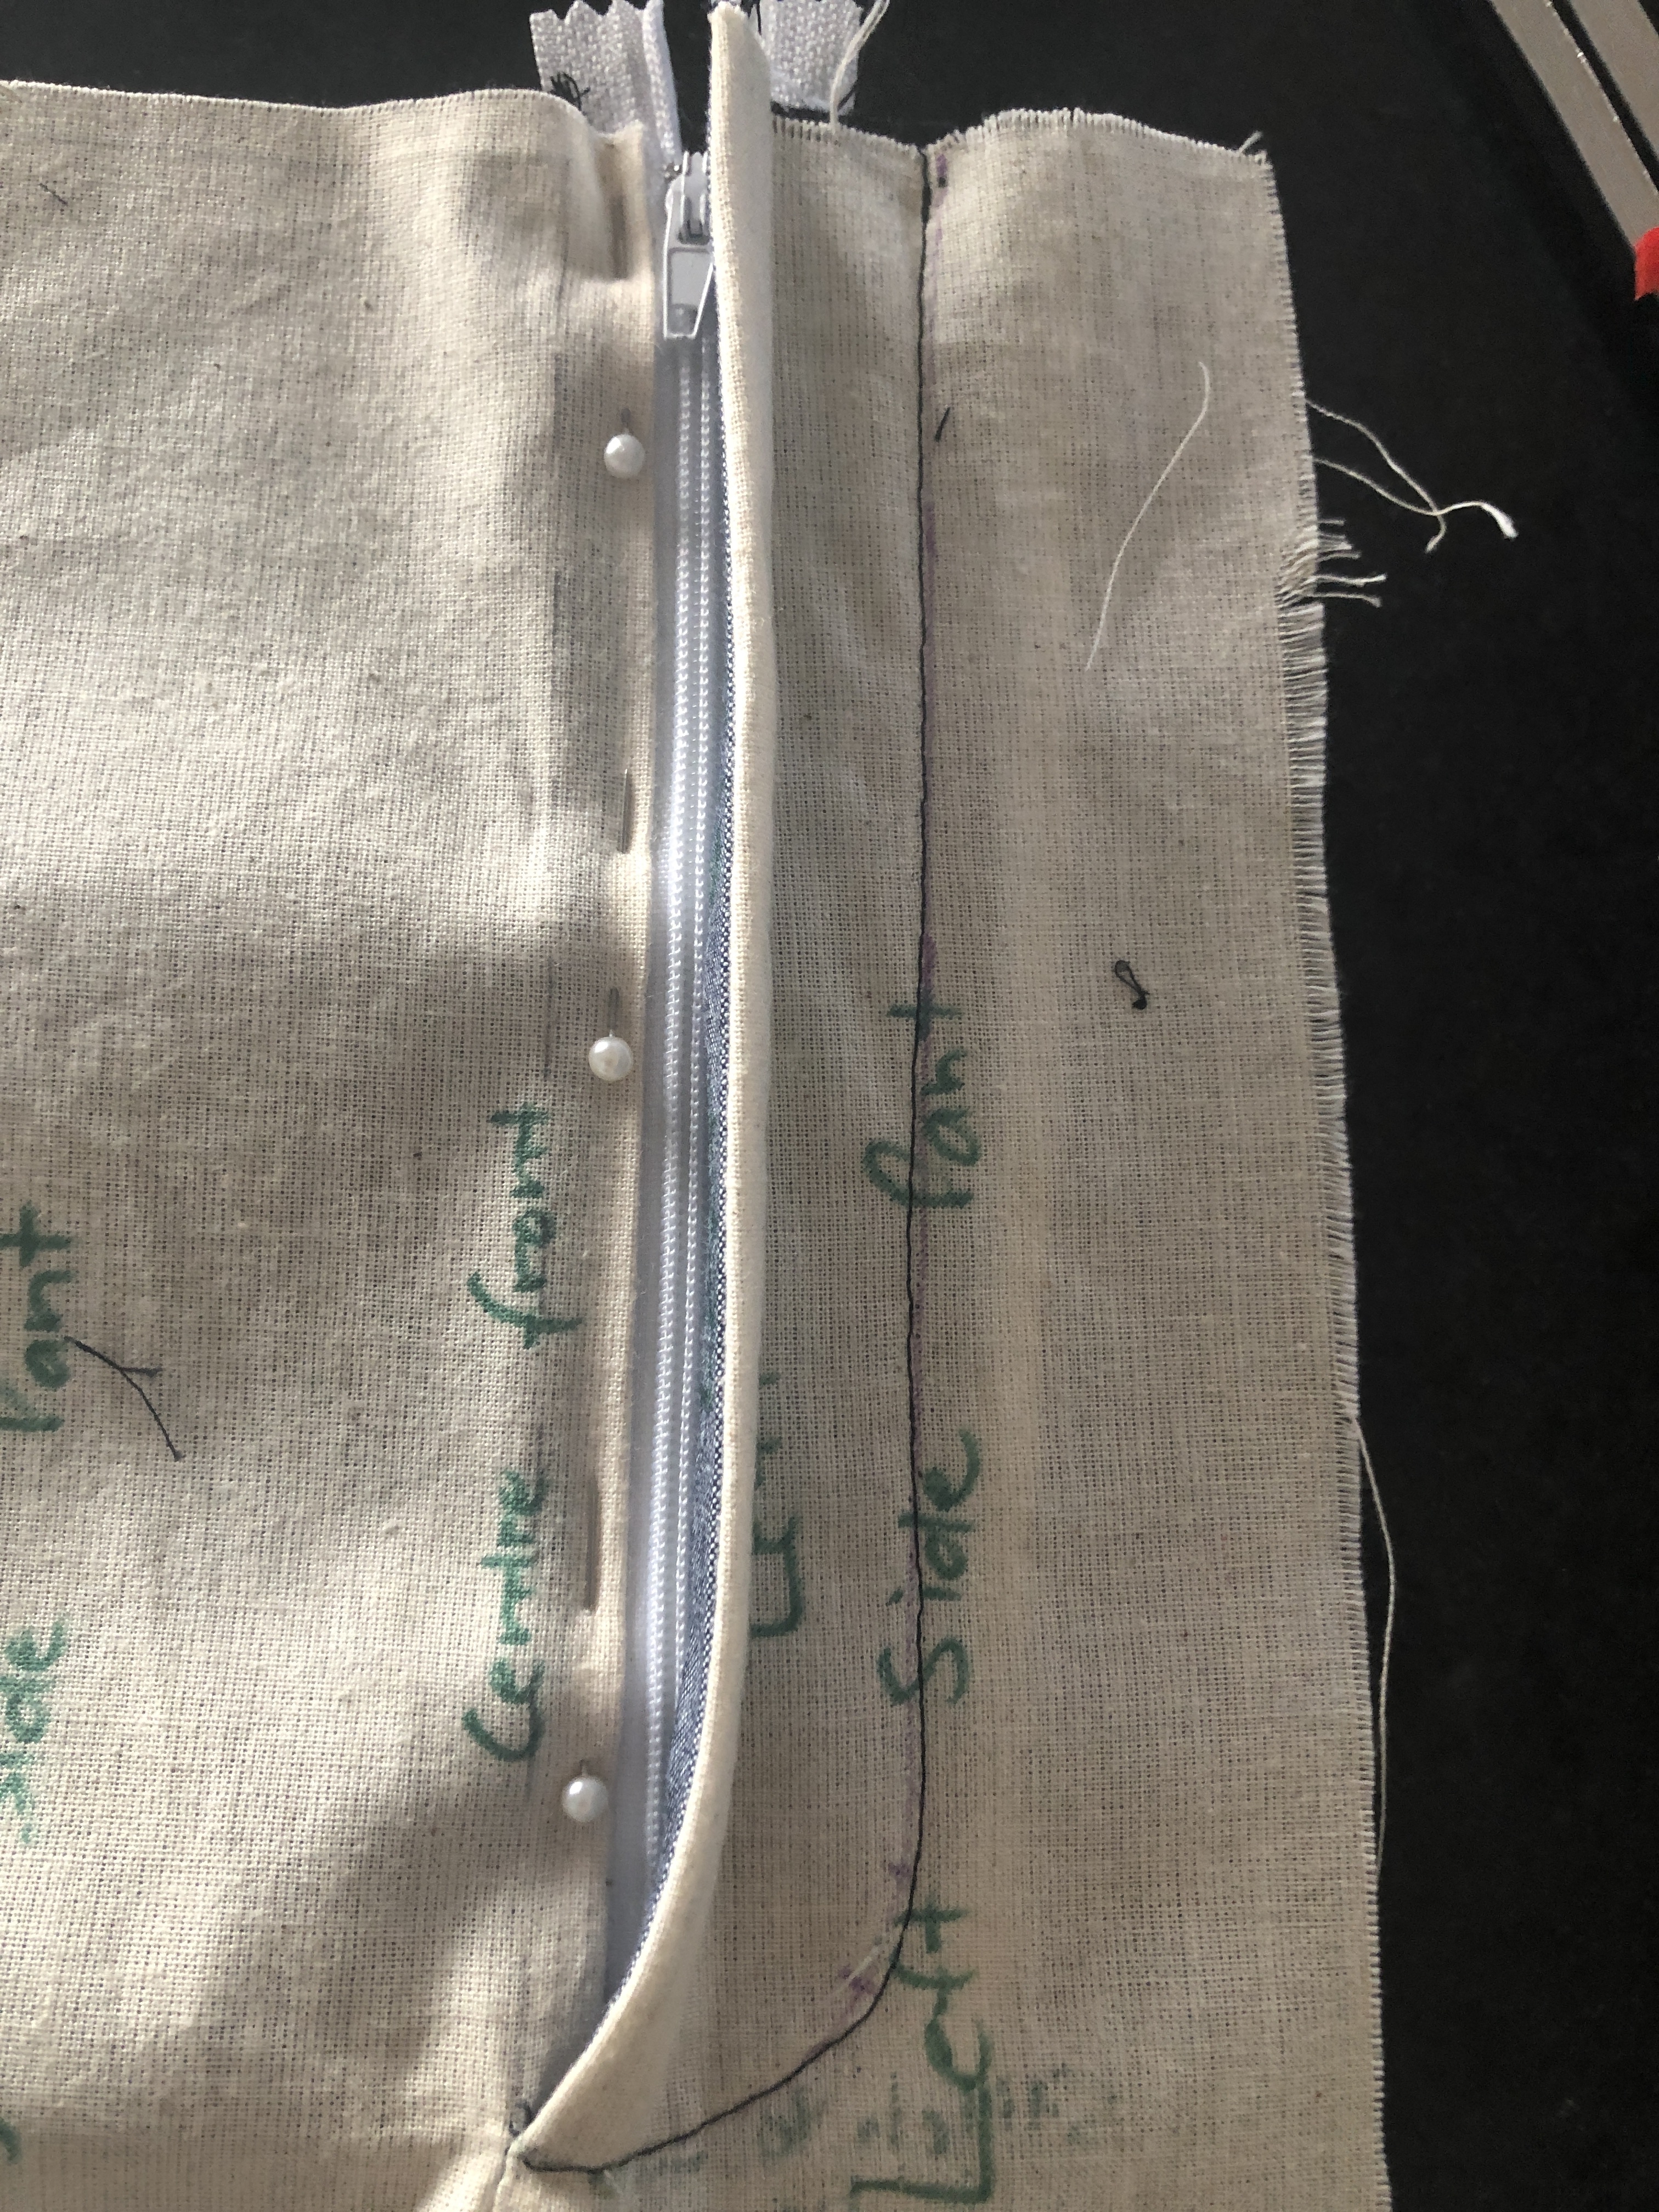
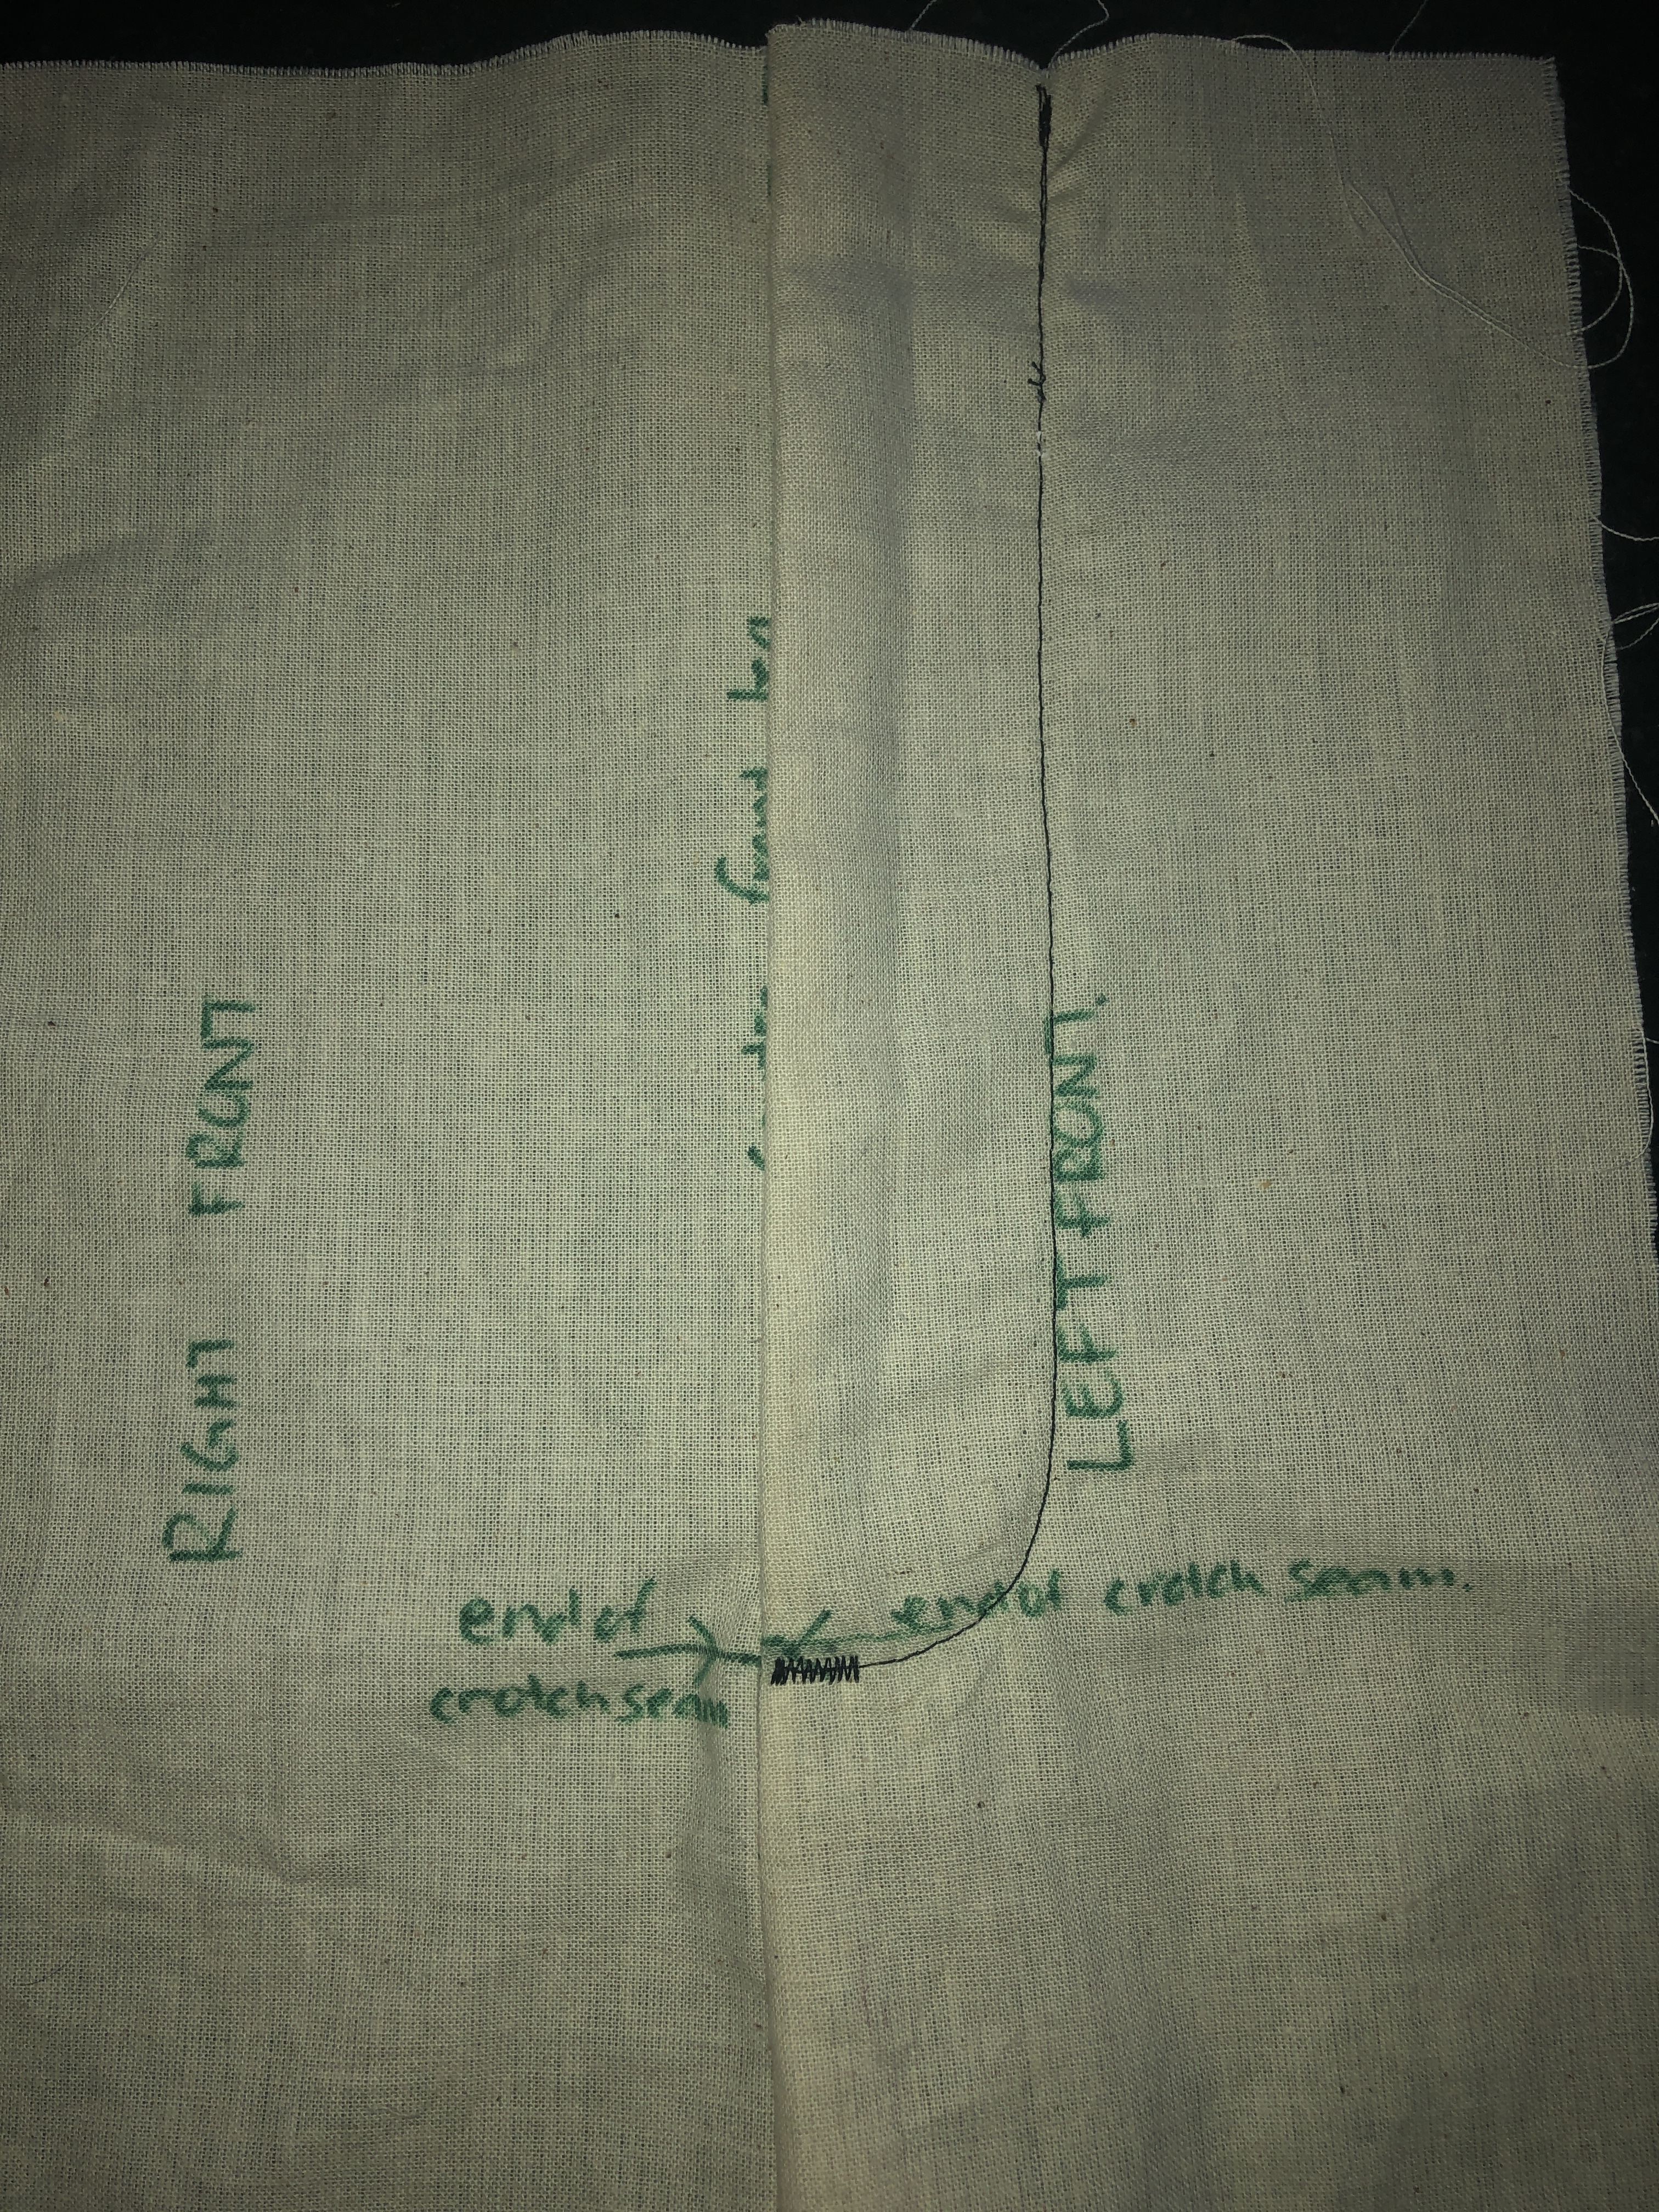
I usually place the stopper about 7mm higher than the notch point, the point where the crotch seam is stitched to. This will give you enough clearance to topstitch , without hitting the stopper with your needle and stuffing your sewing machine!
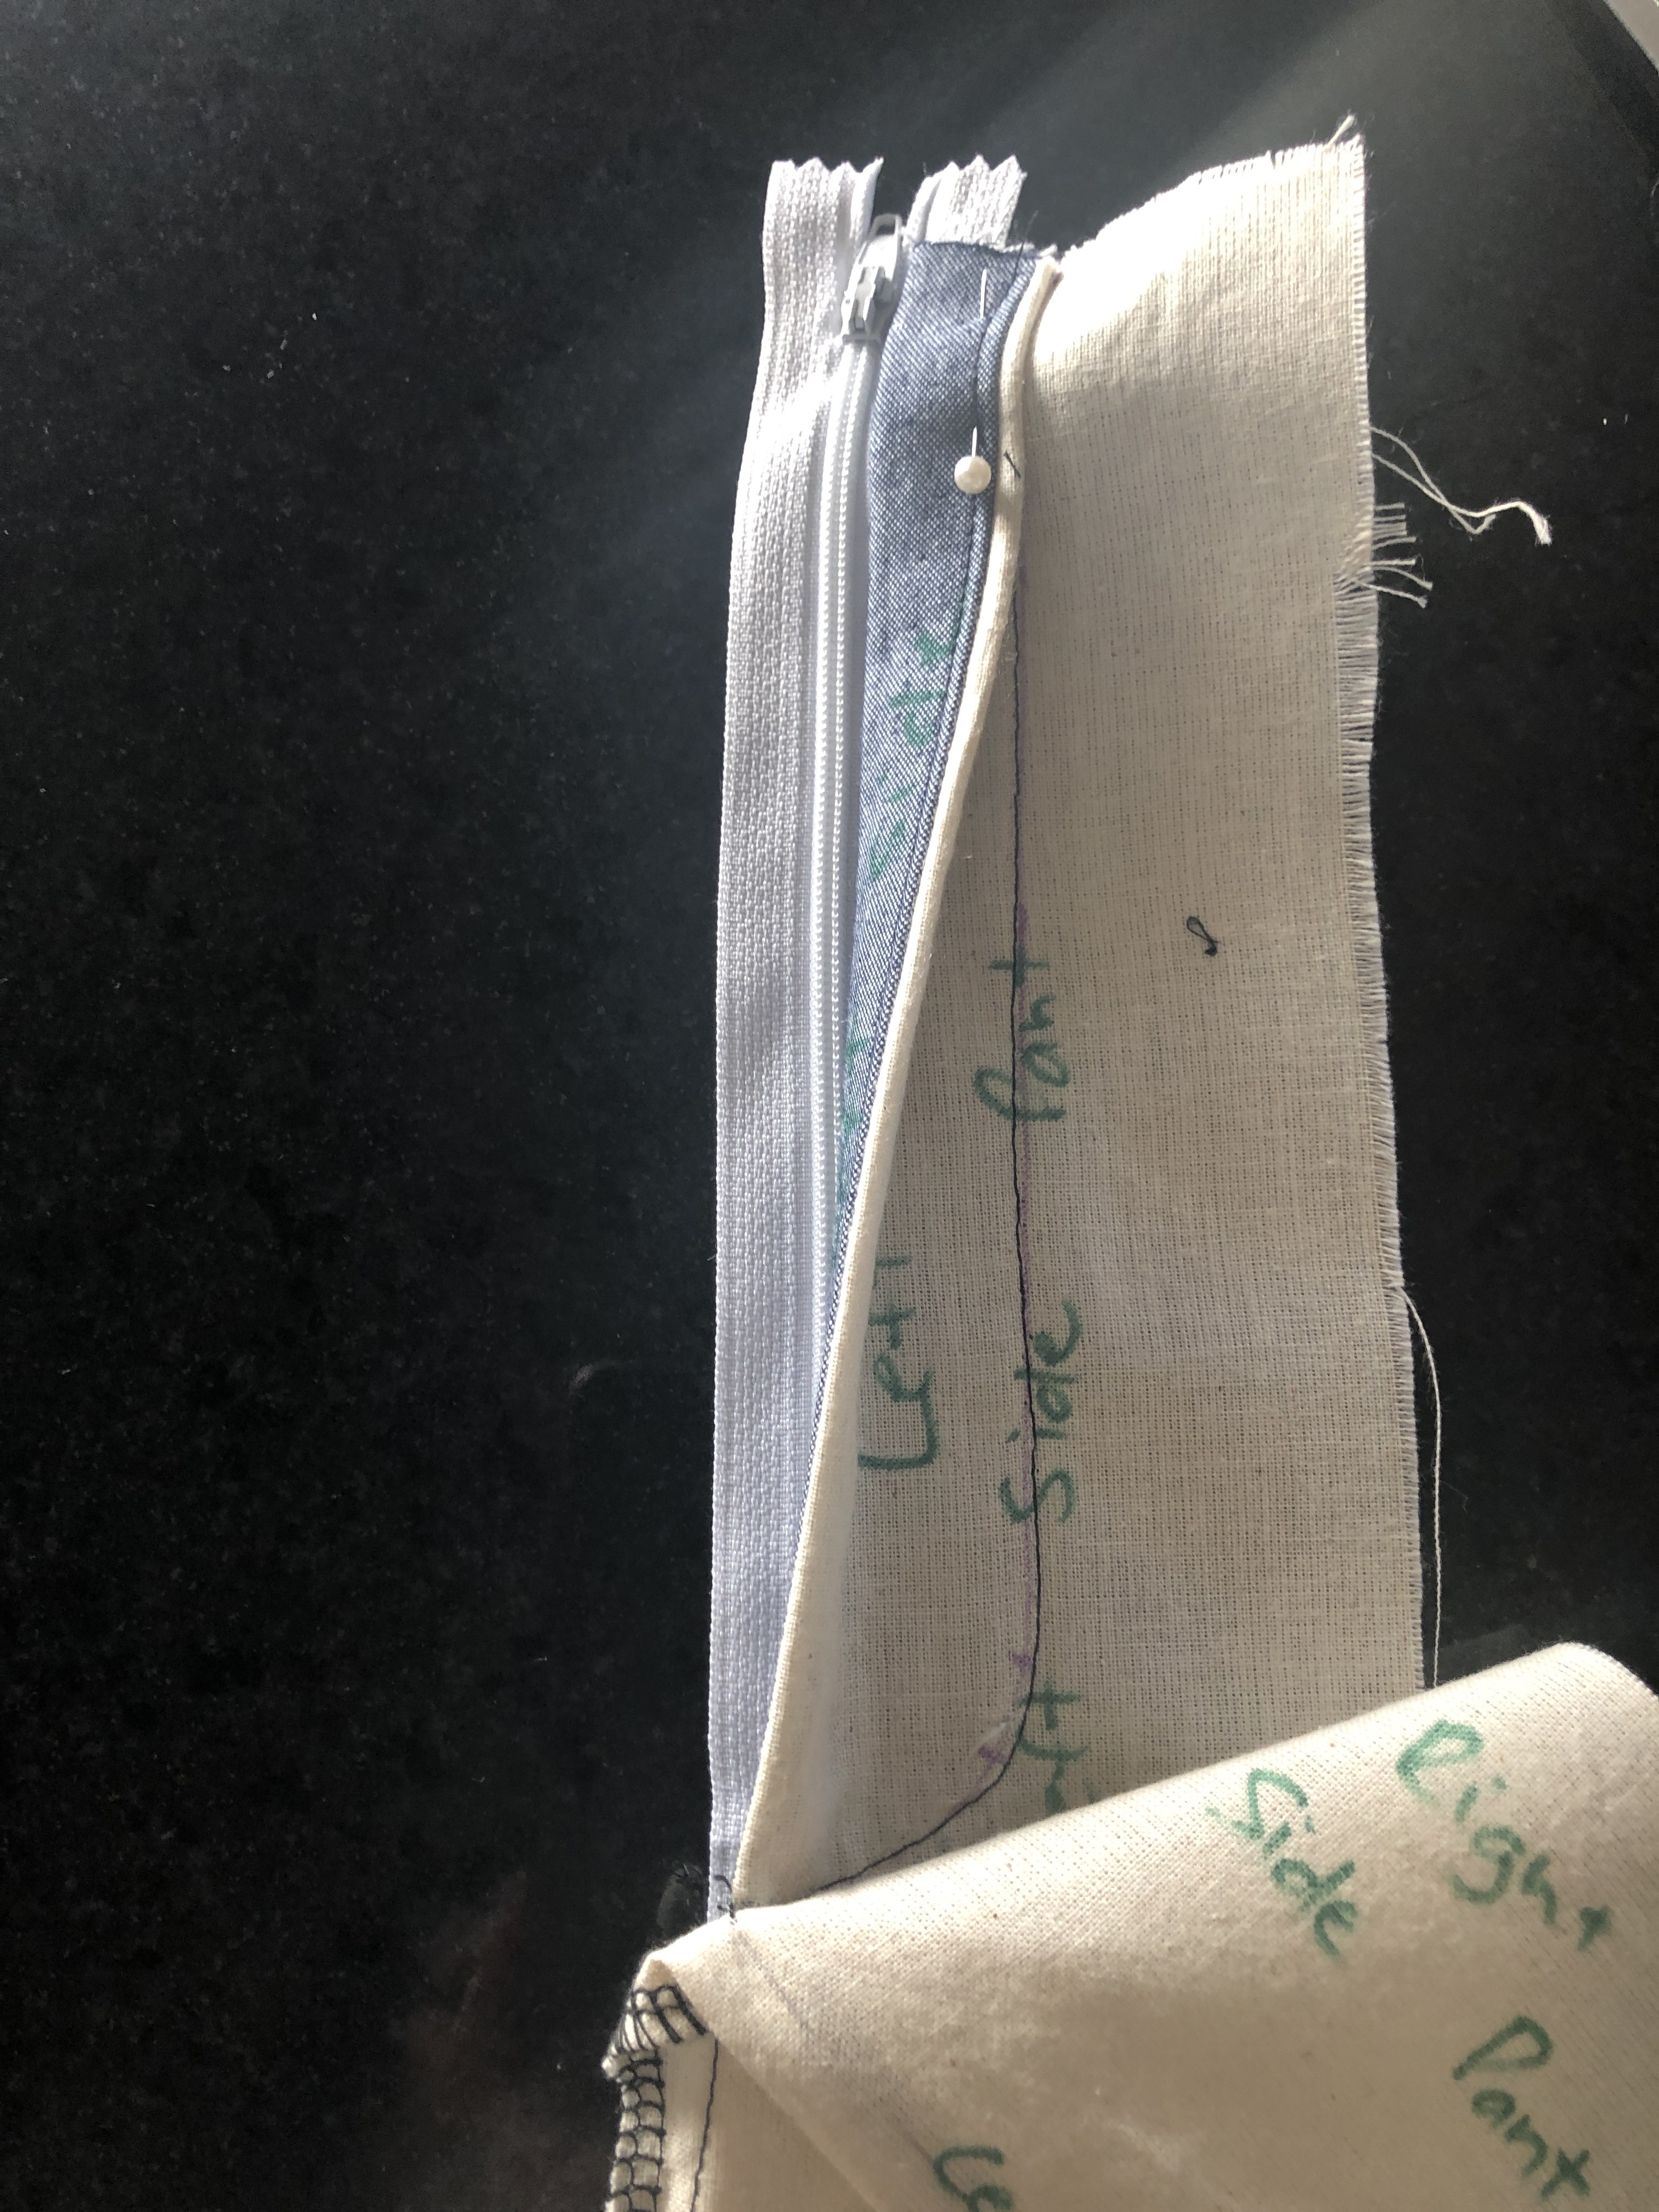
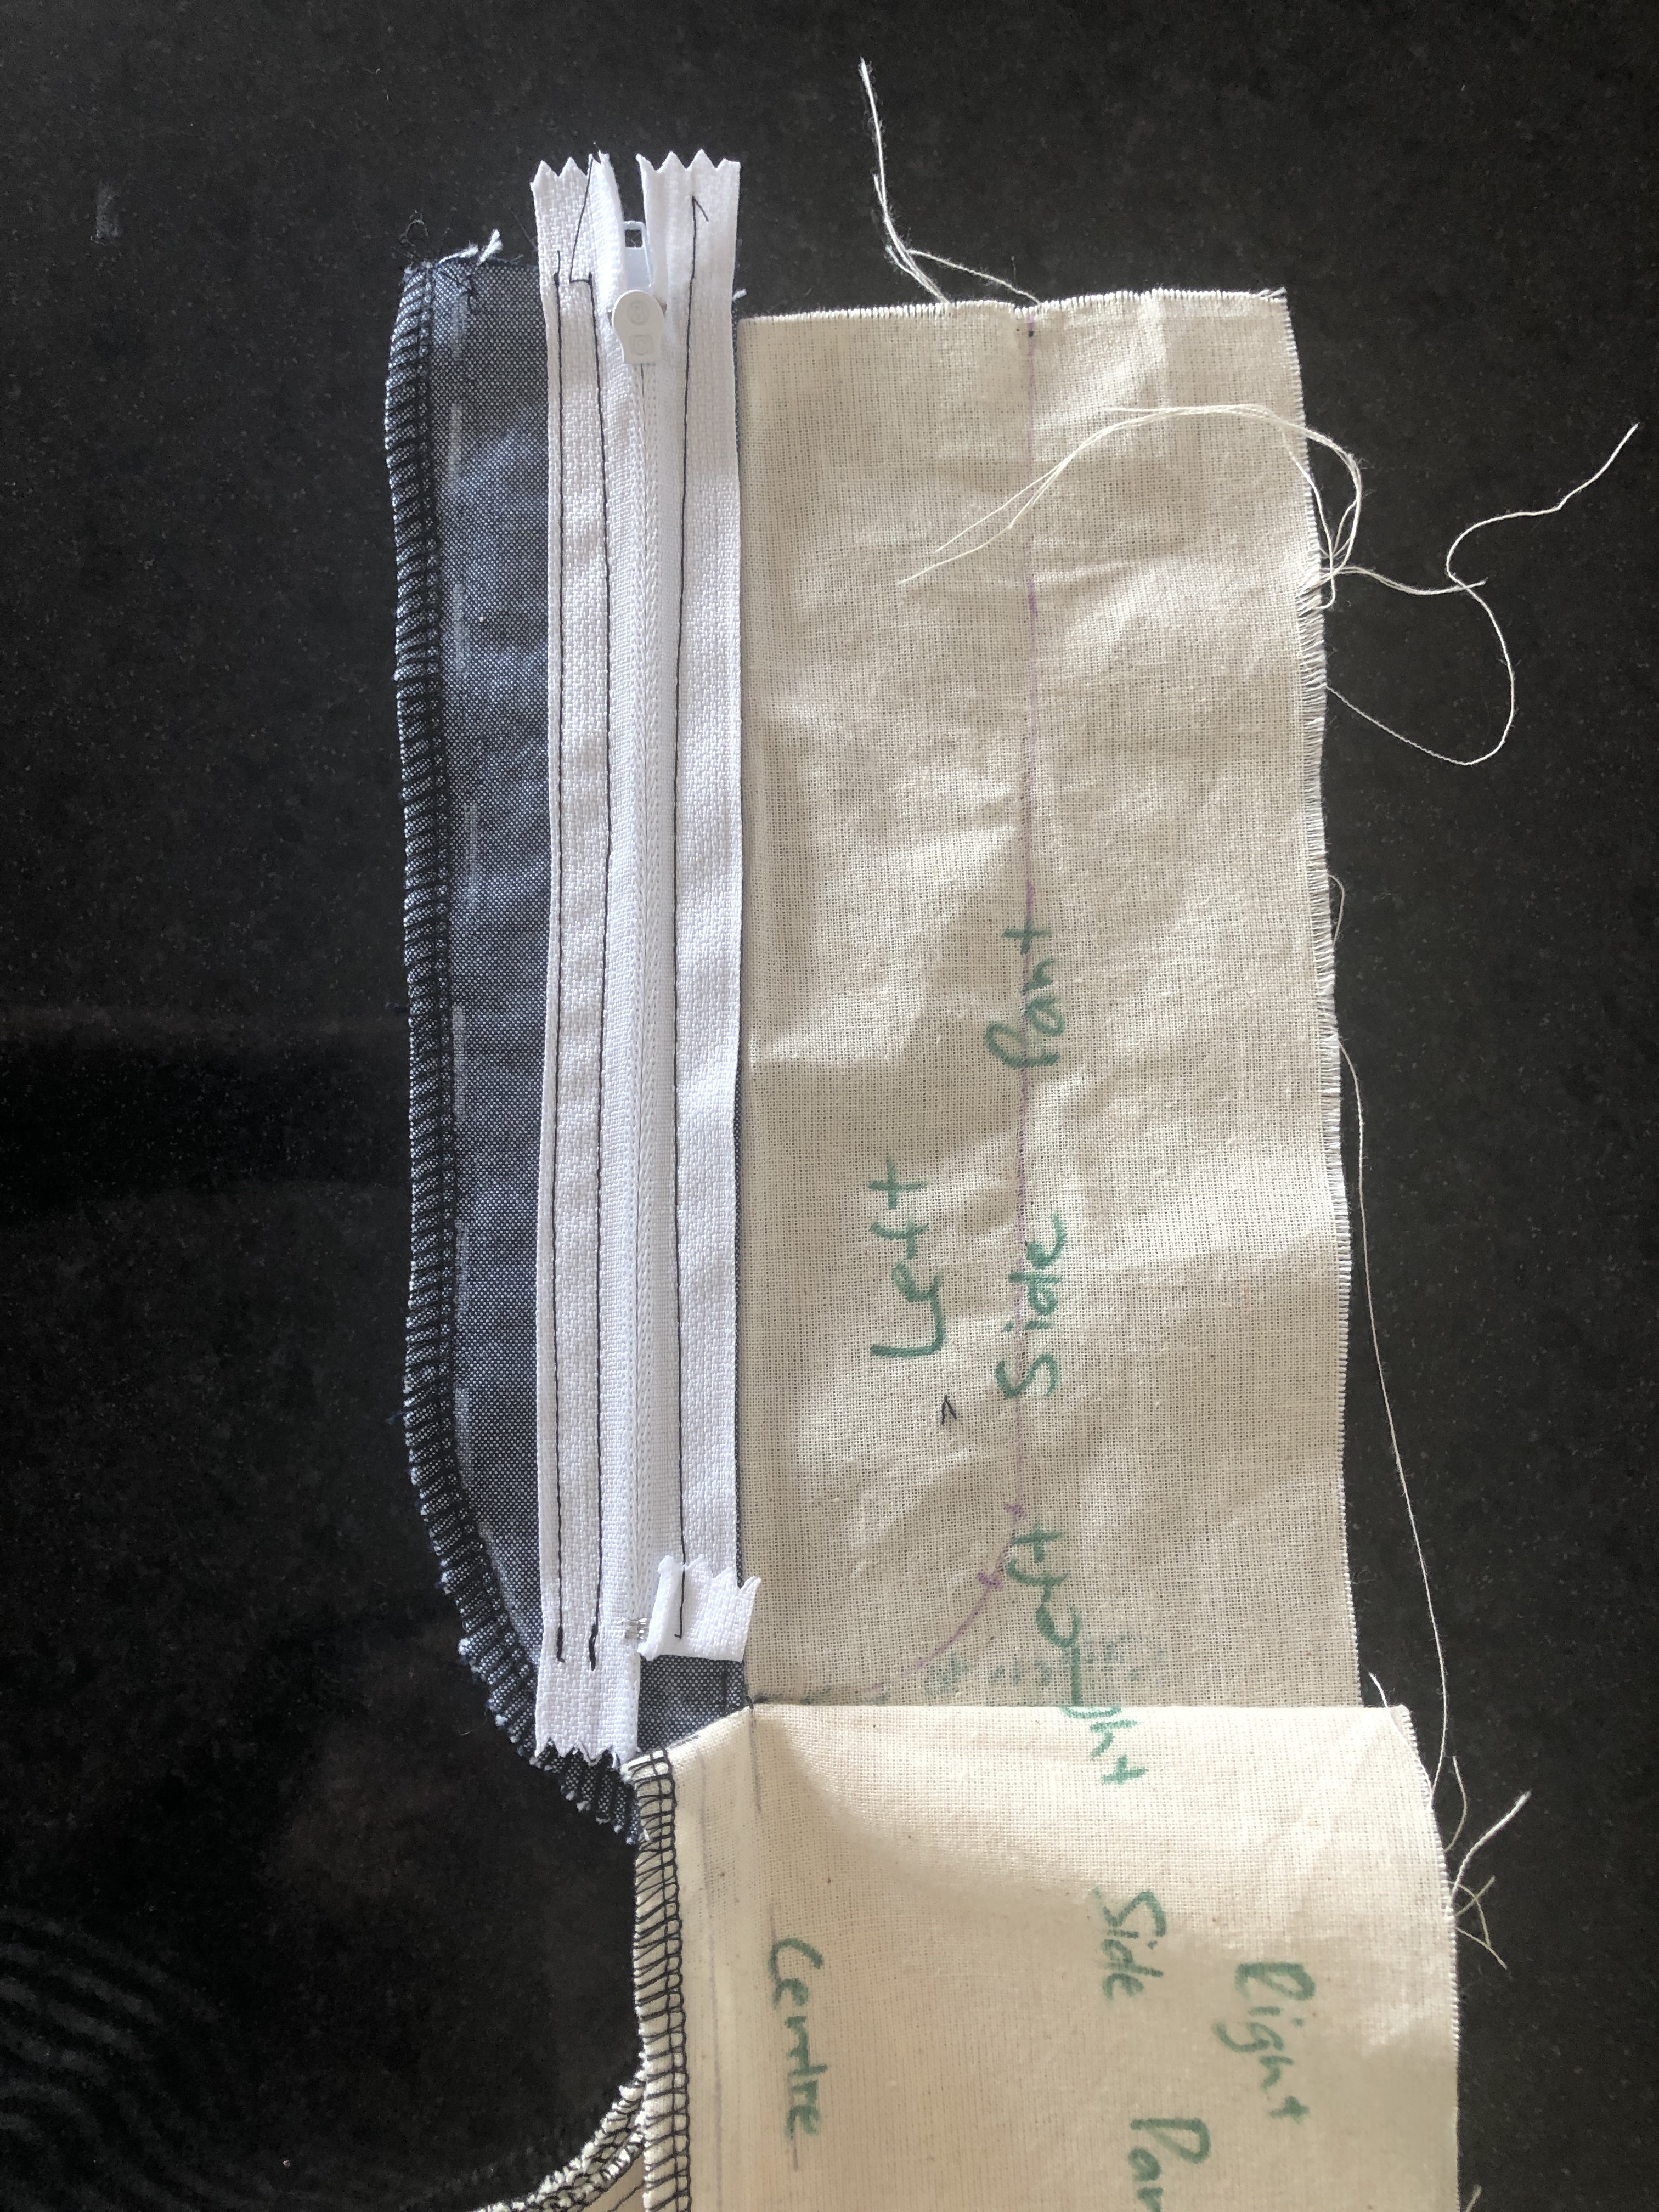
Change to your zipper foot and baste with a large stitch, I use 6. This will be removed shortly.
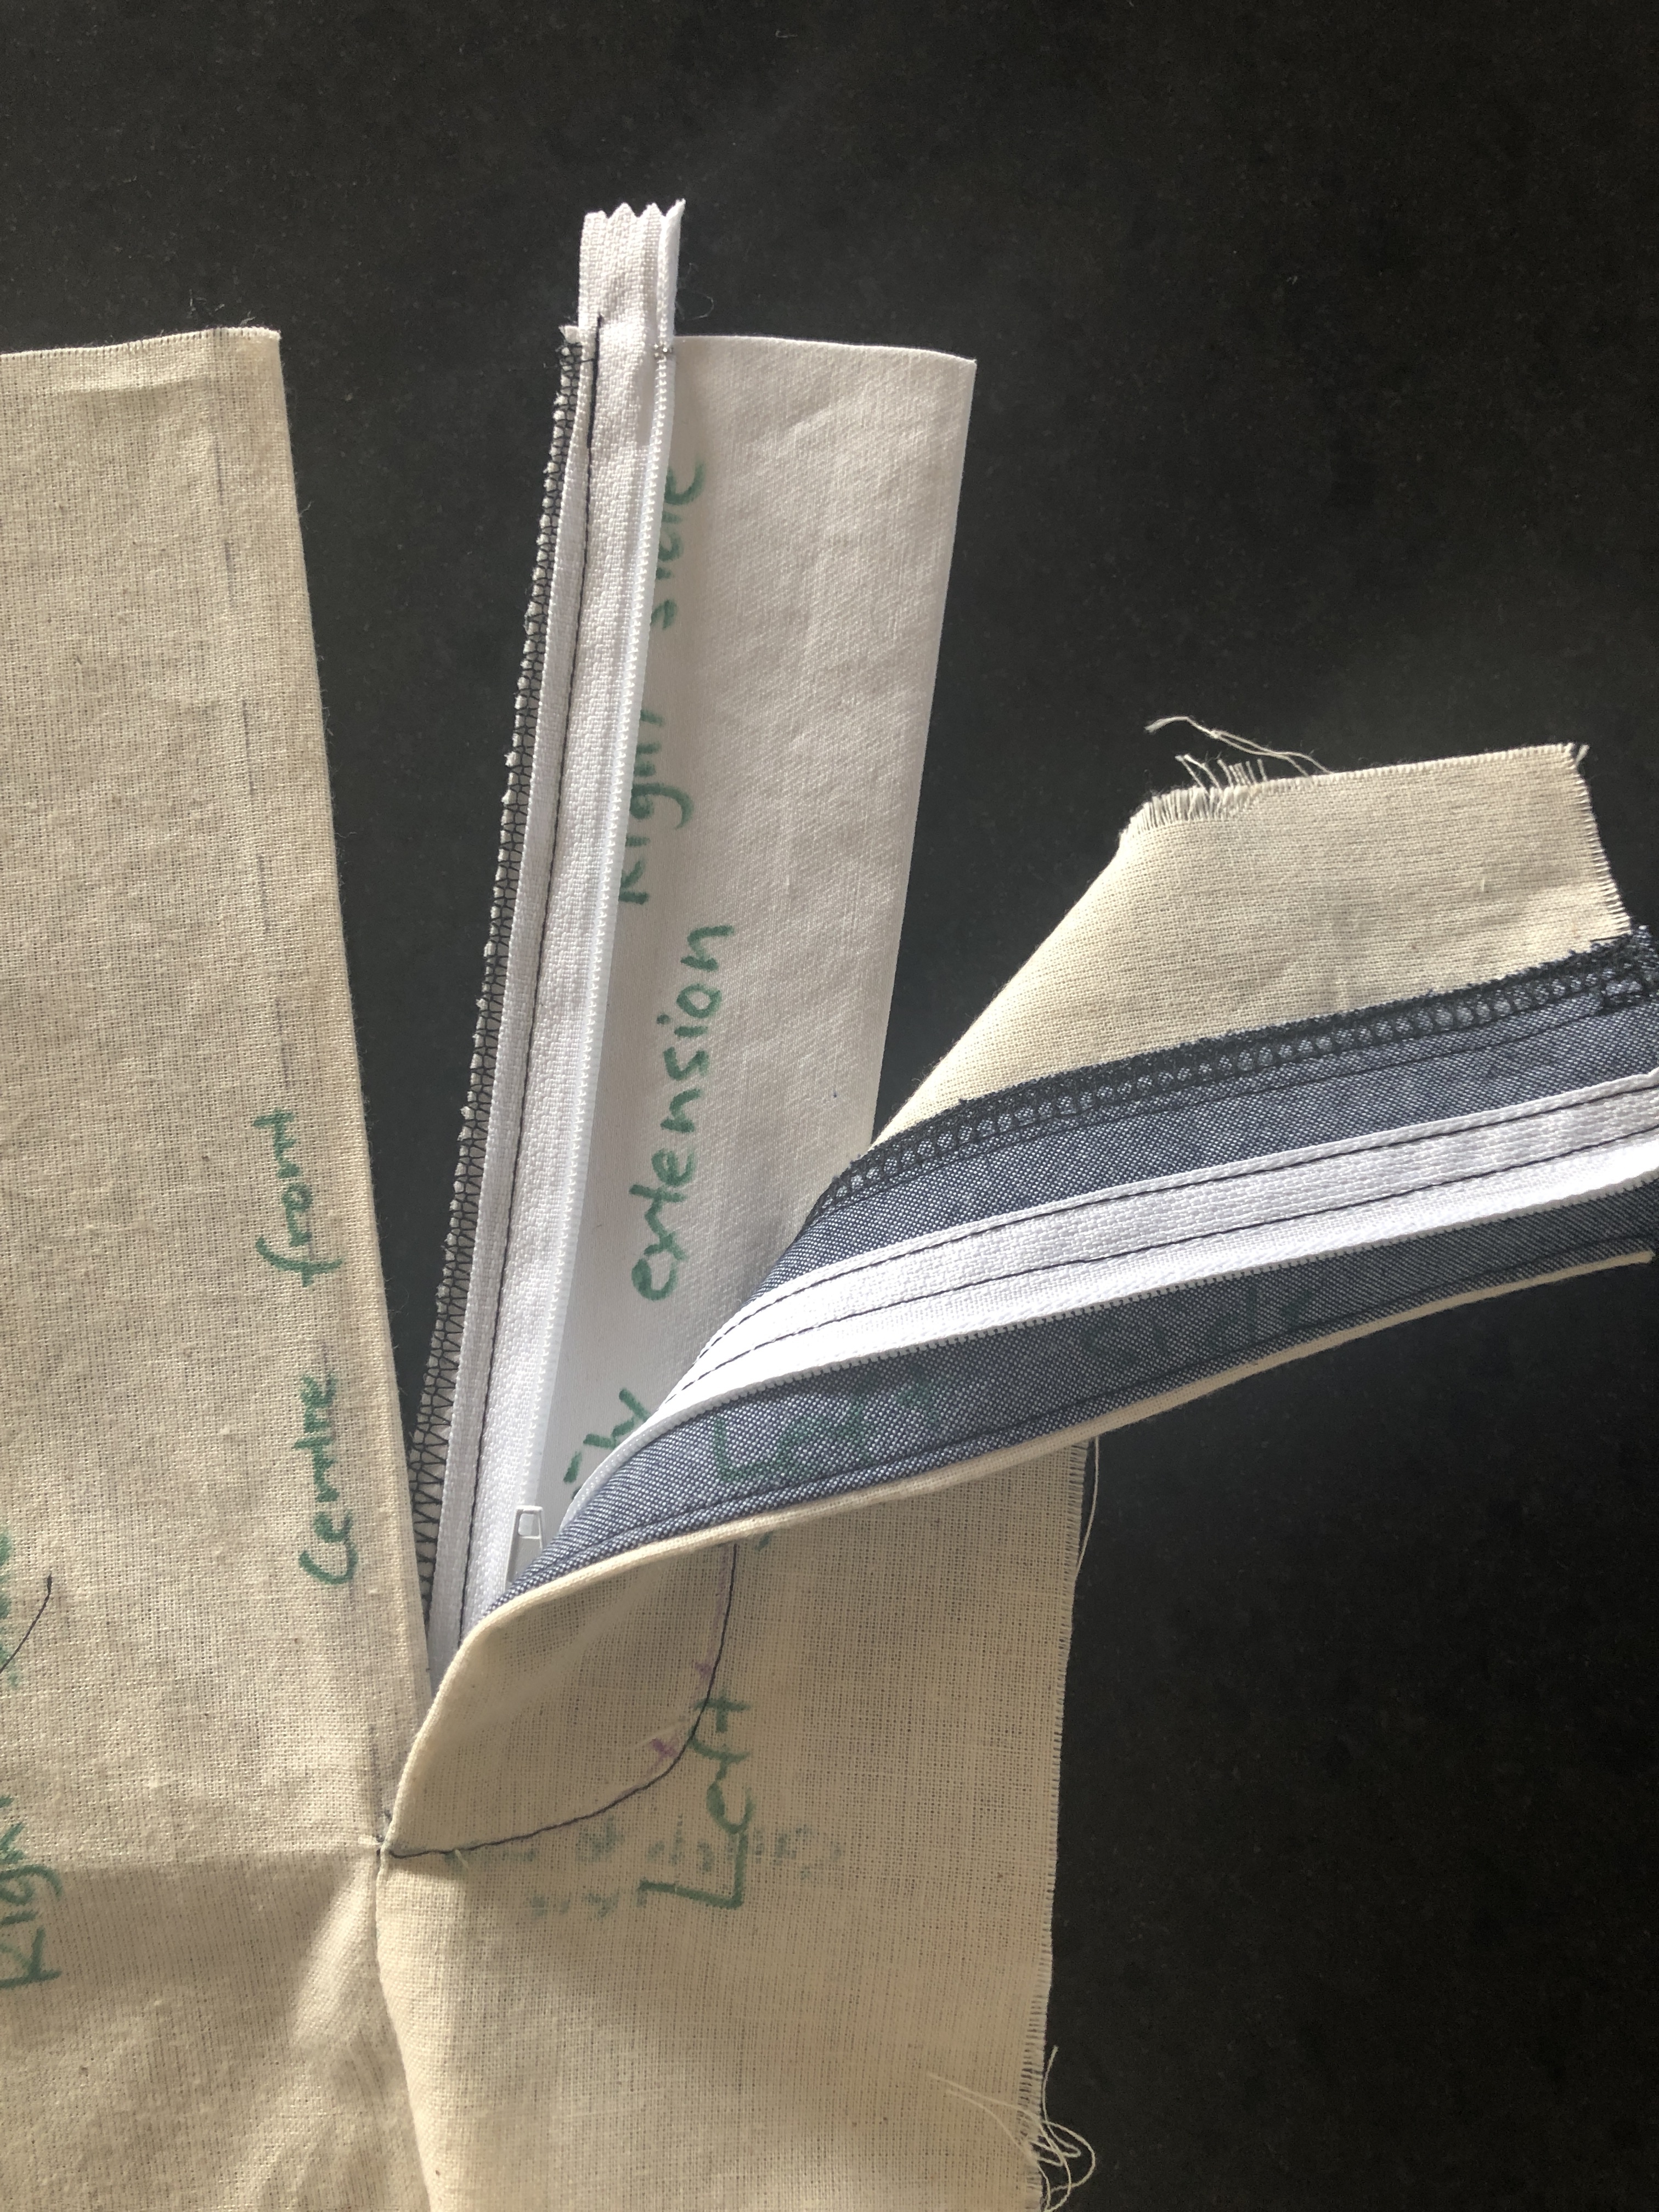
Stitch down with two rows on the other side of the zip tape (normal stitch length)
Note: remember to fold up the end of the basted zip tape side – as image above.
This clears the tape out of the way while you do the decorative fly topstitching.