by closet case patterns


I probably wouldn’t have purchased this group of patterns if it wasn’t for the quirky video that popped up on instagram. I was sucked in! Purchasing the whole shiny suite of styles. I am by no means a beginner sewer, but am always keen to learn something new.
After excitedly sewing up the pants in calico, I was soon annoyed as I pulled them on. I kind of expected a better fit, especially after the hype around their Alvanon body form investment and all the research that goes with this brand.
Every body shape is different, I realise that, but if a pant is well drafted and the balance is good, they are relatively easy to adjust to most posture variations and measurements.
My usual adjustments on a well drafted pattern are as follows;
My pelvis tilts forward, which in turn makes my pants a bit high in the front waist and I will get drag lines on the back of the thighs, especially in tighter pant styles (hard to avoid). I always drop the front rise between 1-1.5 cm to counteract this. I’m also short from the waist to hip. I measure 18.5cm and the average W to H for 168cm height is approx. 21.5cm. I usually scoop out the back crotch by 1cm as well. This group of adjustments will generally give a good outcome
Here were my findings from my size 12 toile with no adjustments.
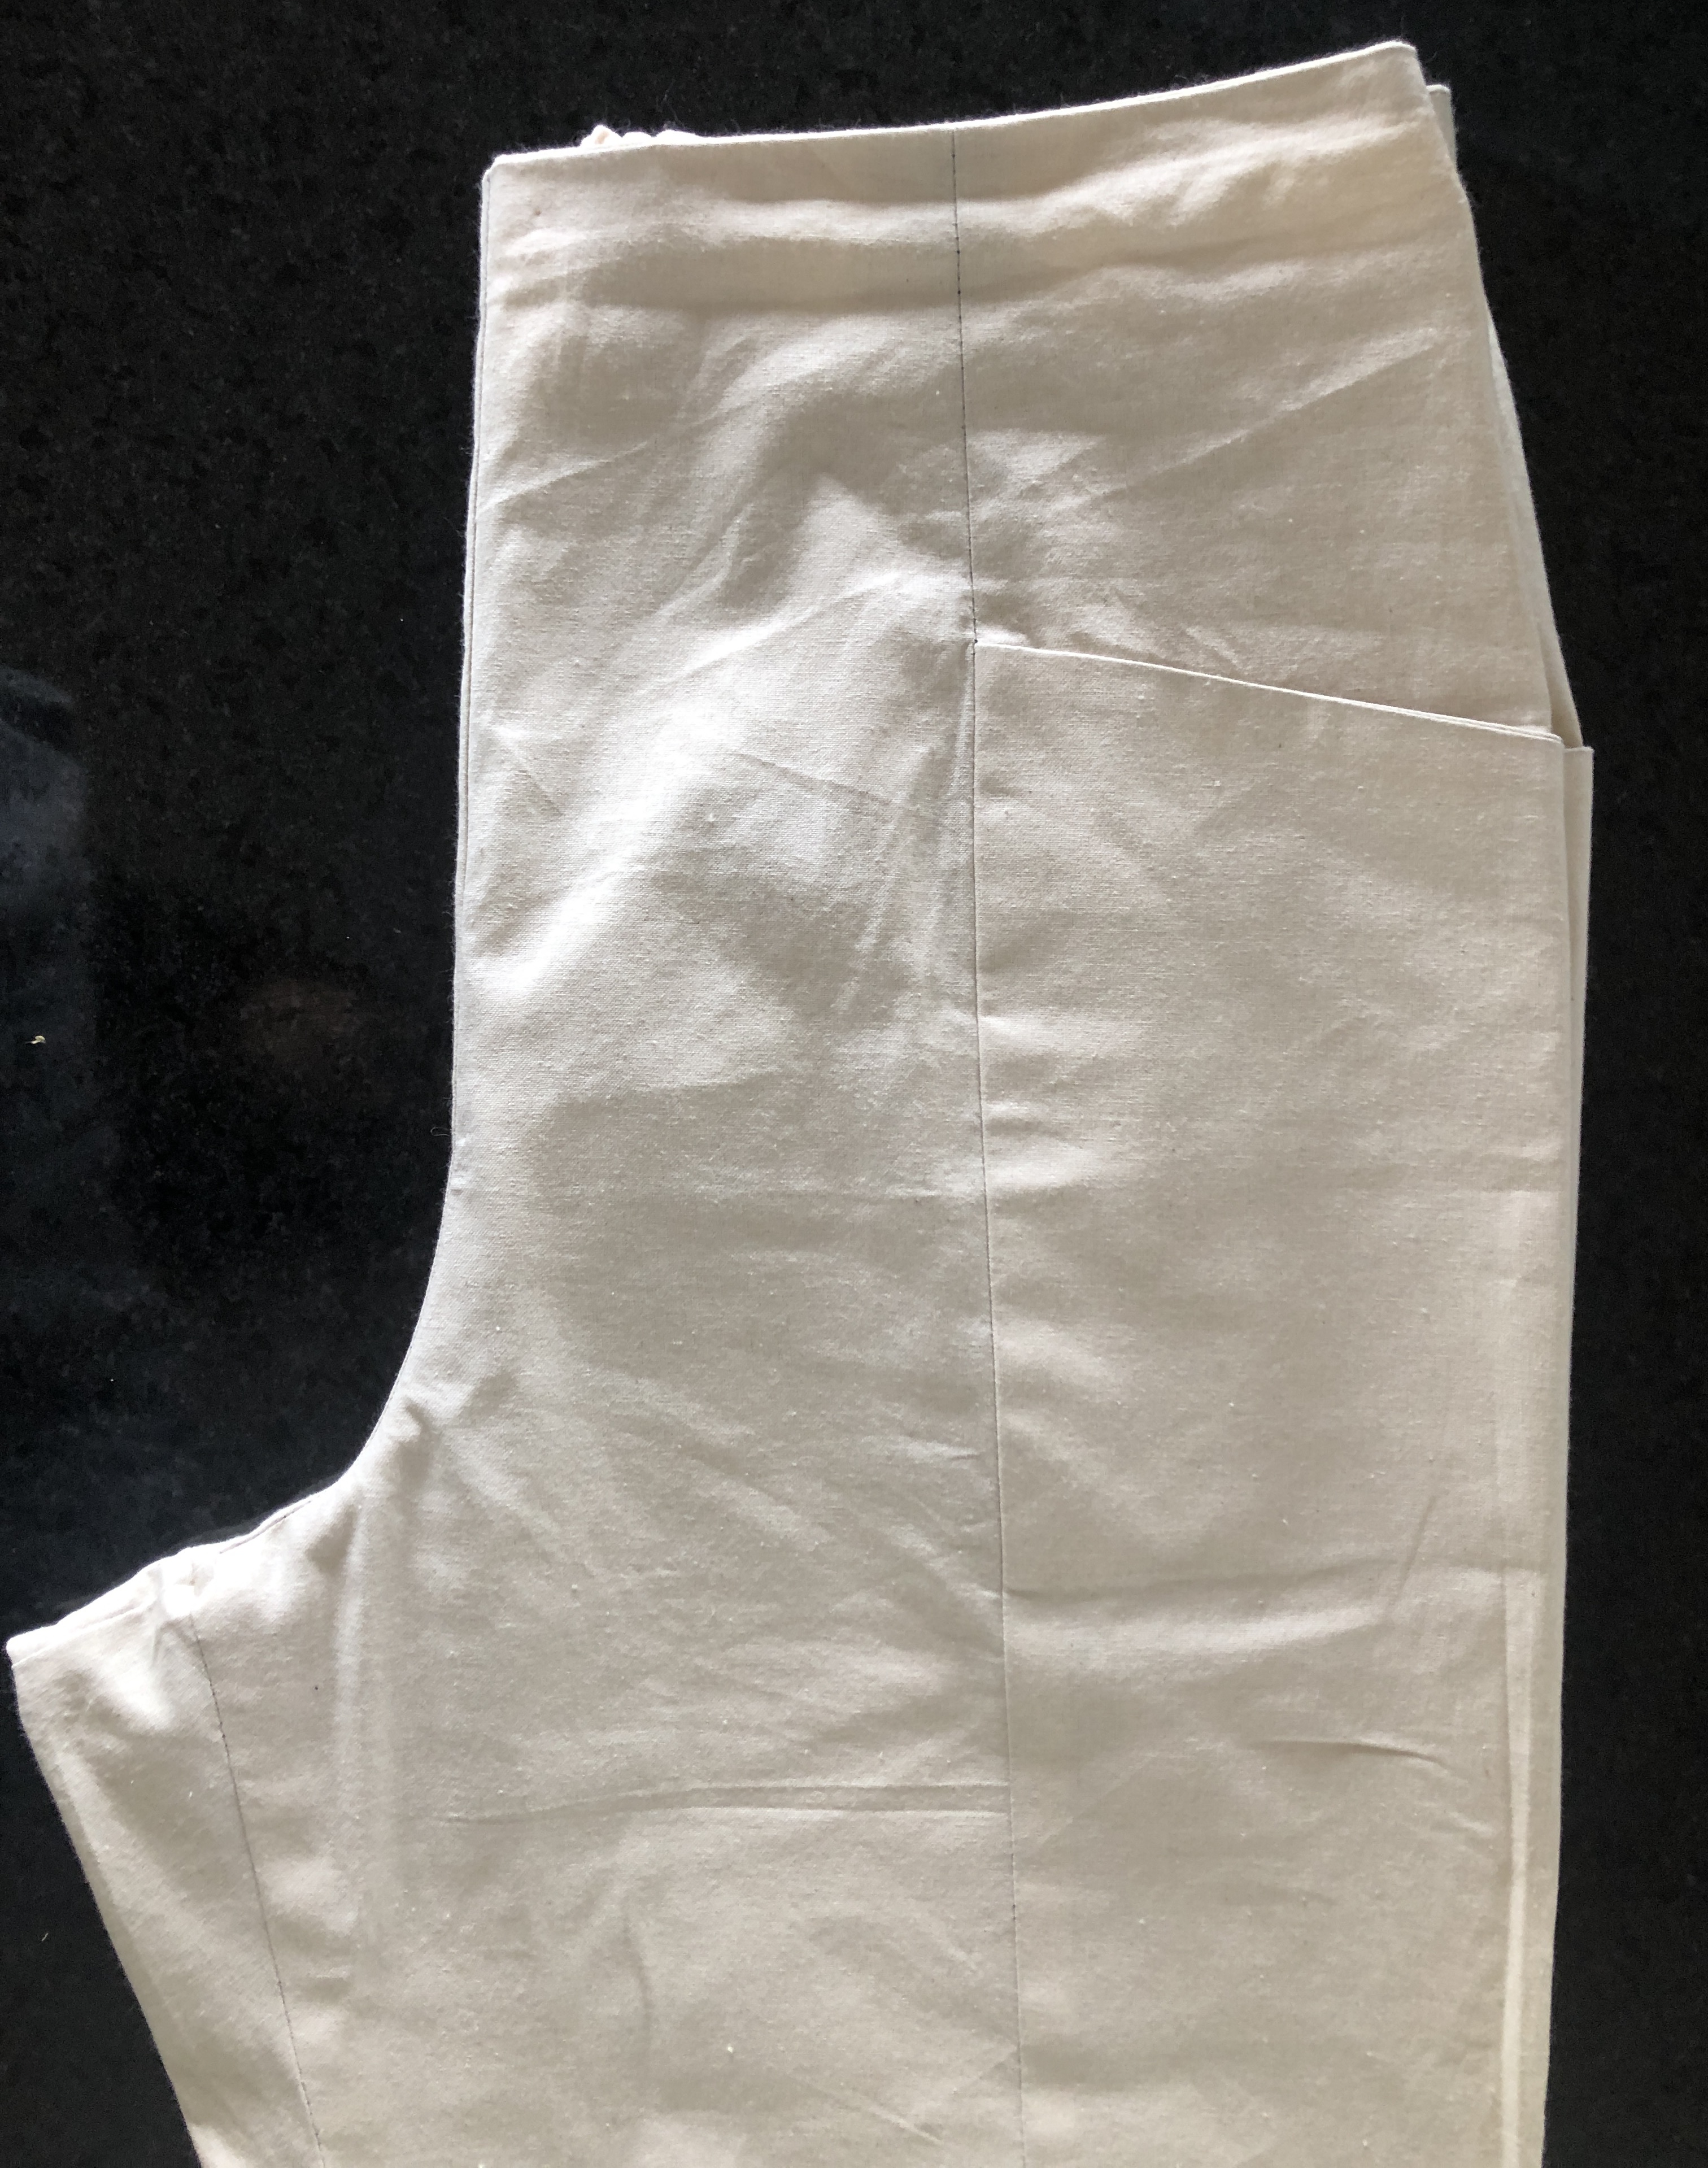
The front waist was high in comparison to the back waist, there was also a weird excess of fabric at the front crotch which was hanging low.
See my image below of the folded pant, there doesn’t seem to be much of a difference between the front and back rise.


I left them overnight and contemplated the best approach of how I would correct this pattern to my liking.
I compared an elasticated waist style I sewed last summer which I knew fitted nicely.
The back section of the pants I liked the fit of (brown paper image) had a very different angle at the upper back. You can see in my image how different the pattern shapes are. The extra fabric which has been aded for the elastic back, seems to have all been added at the side, instead of distributed evenly at centre back as well. You can see this on my pant below.
I have removed a wedge from the inseam (red markings below) 2cm wide. After this has been removed the leg is in a similar line to my preferred pattern. I re-drew the grainline to the top of the back pant, following the lower leg grainline.
The lower image brown paper on top is my pattern showing how I also slimmed the inseam area. I also narrowed the lower leg a little (personal preference)
I did add a bit more angle to hip pocket and it is now more like the sketch that comes with the pattern and a little more flattering.
If you don’t want as much gather at the back you could reduce a little. Just remember you have to get them over your hips, so the stretched waist measurement needs to be a little bigger than your hip measurement.

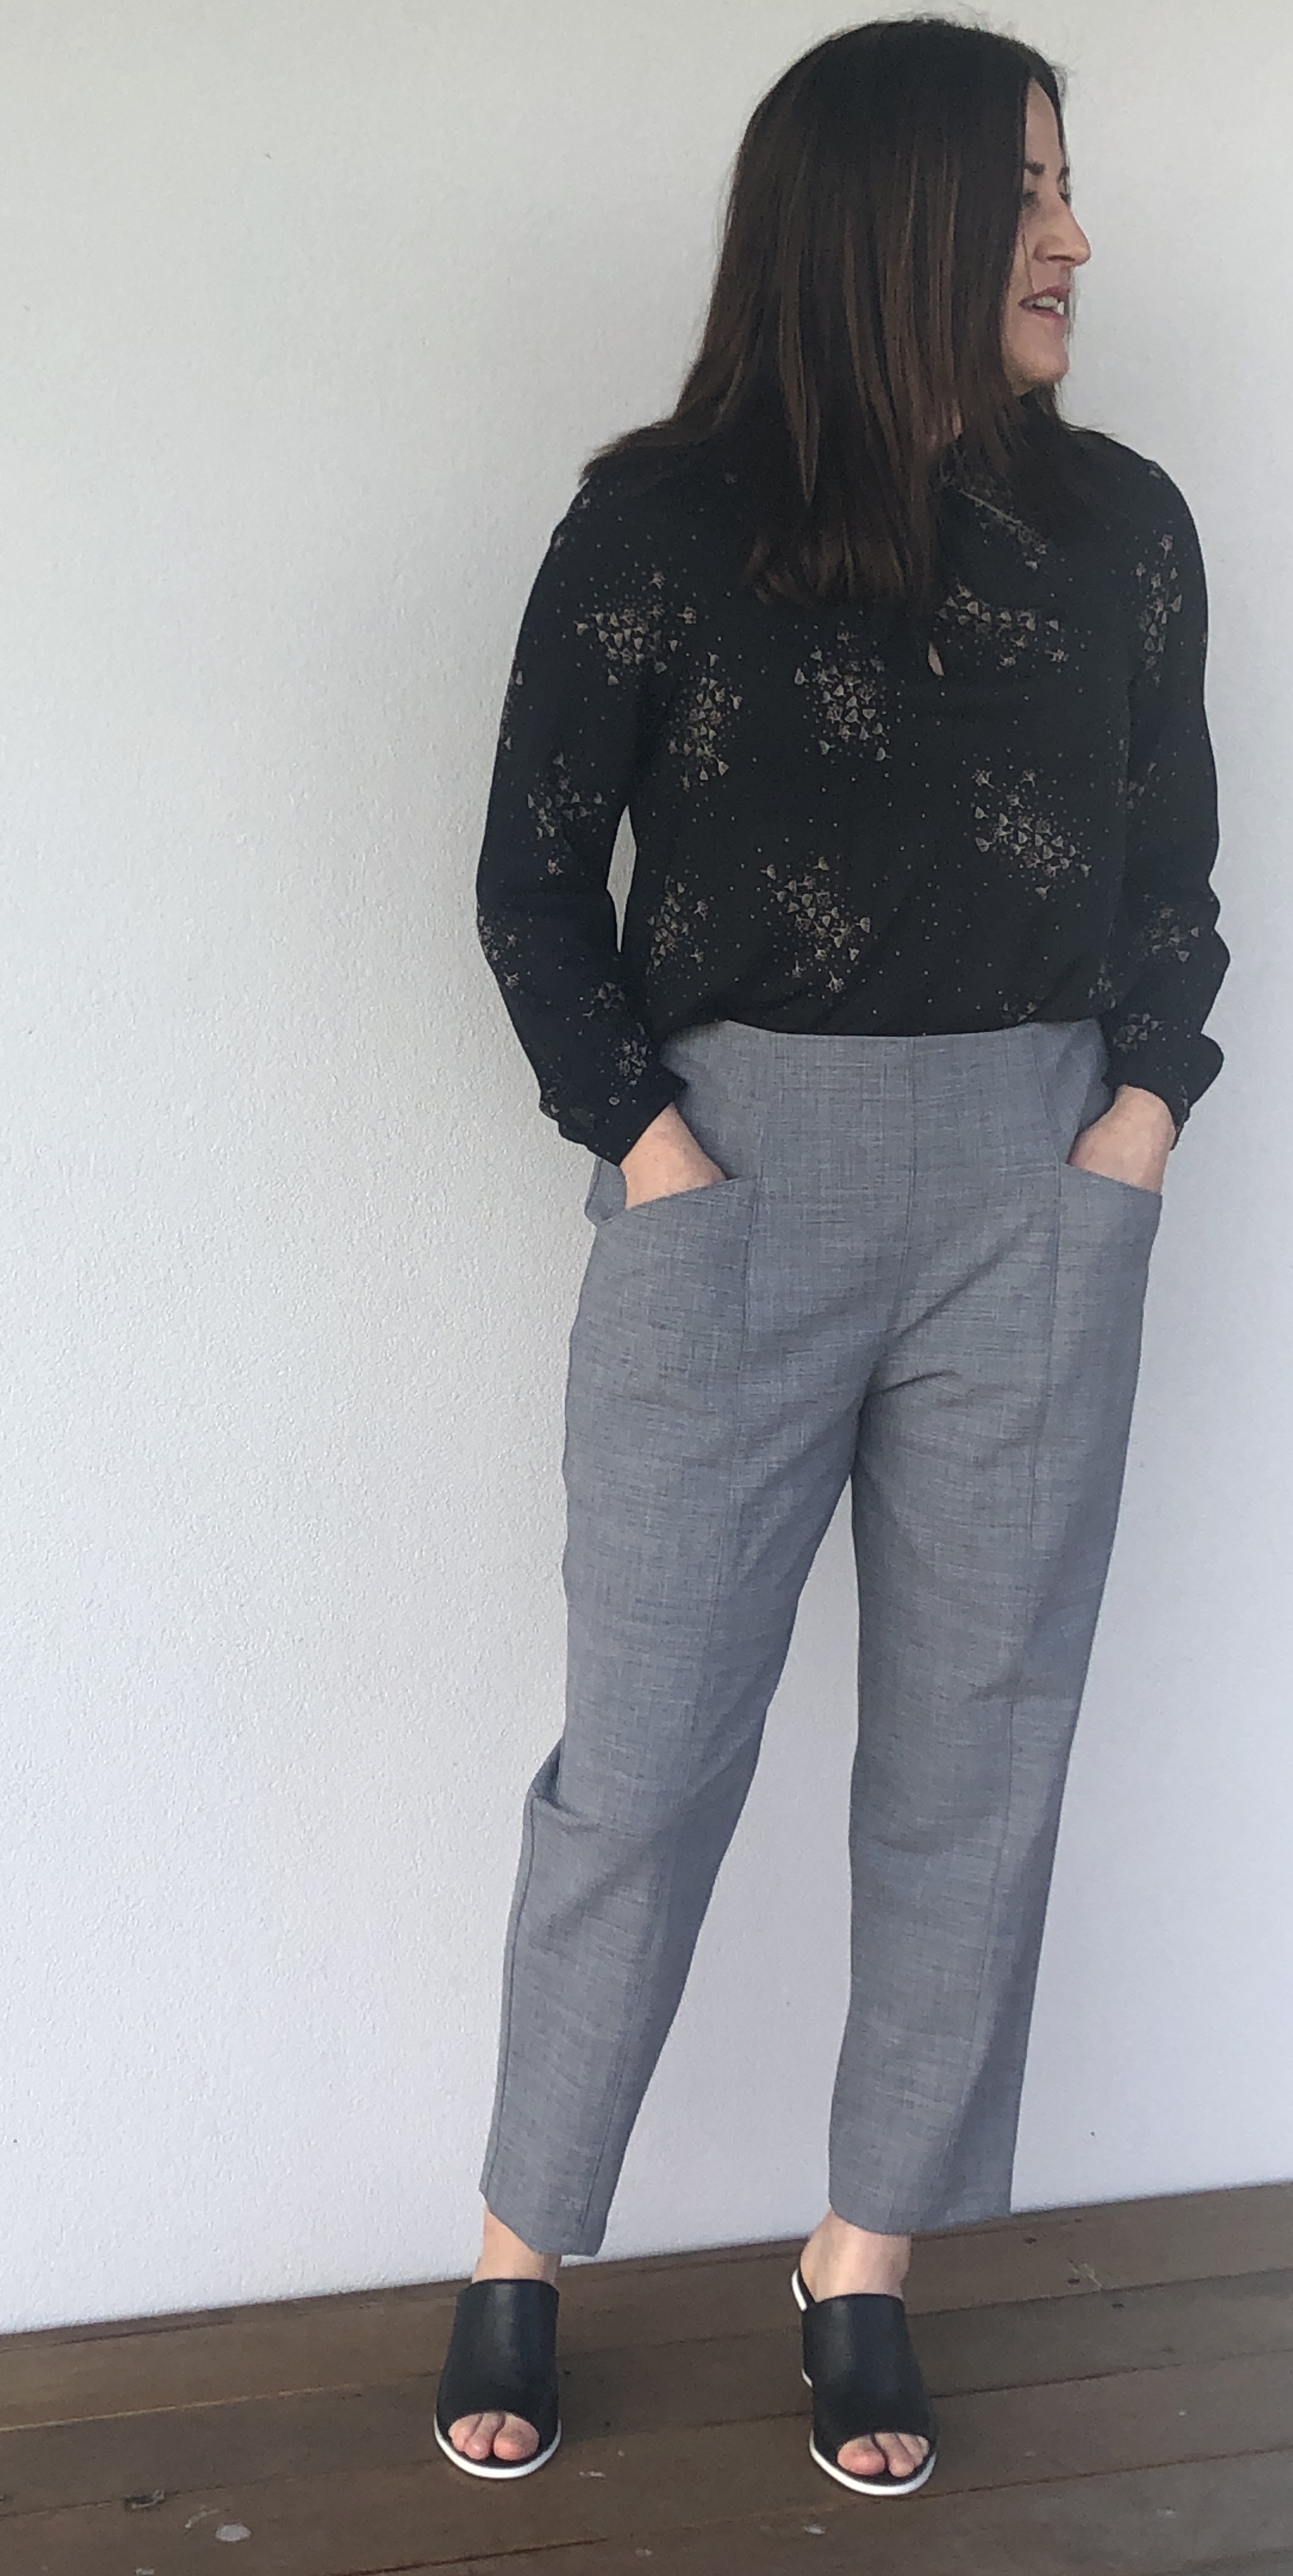
side view- unaltered 
showing different angle of upper back 
wedge removed and grainline changed 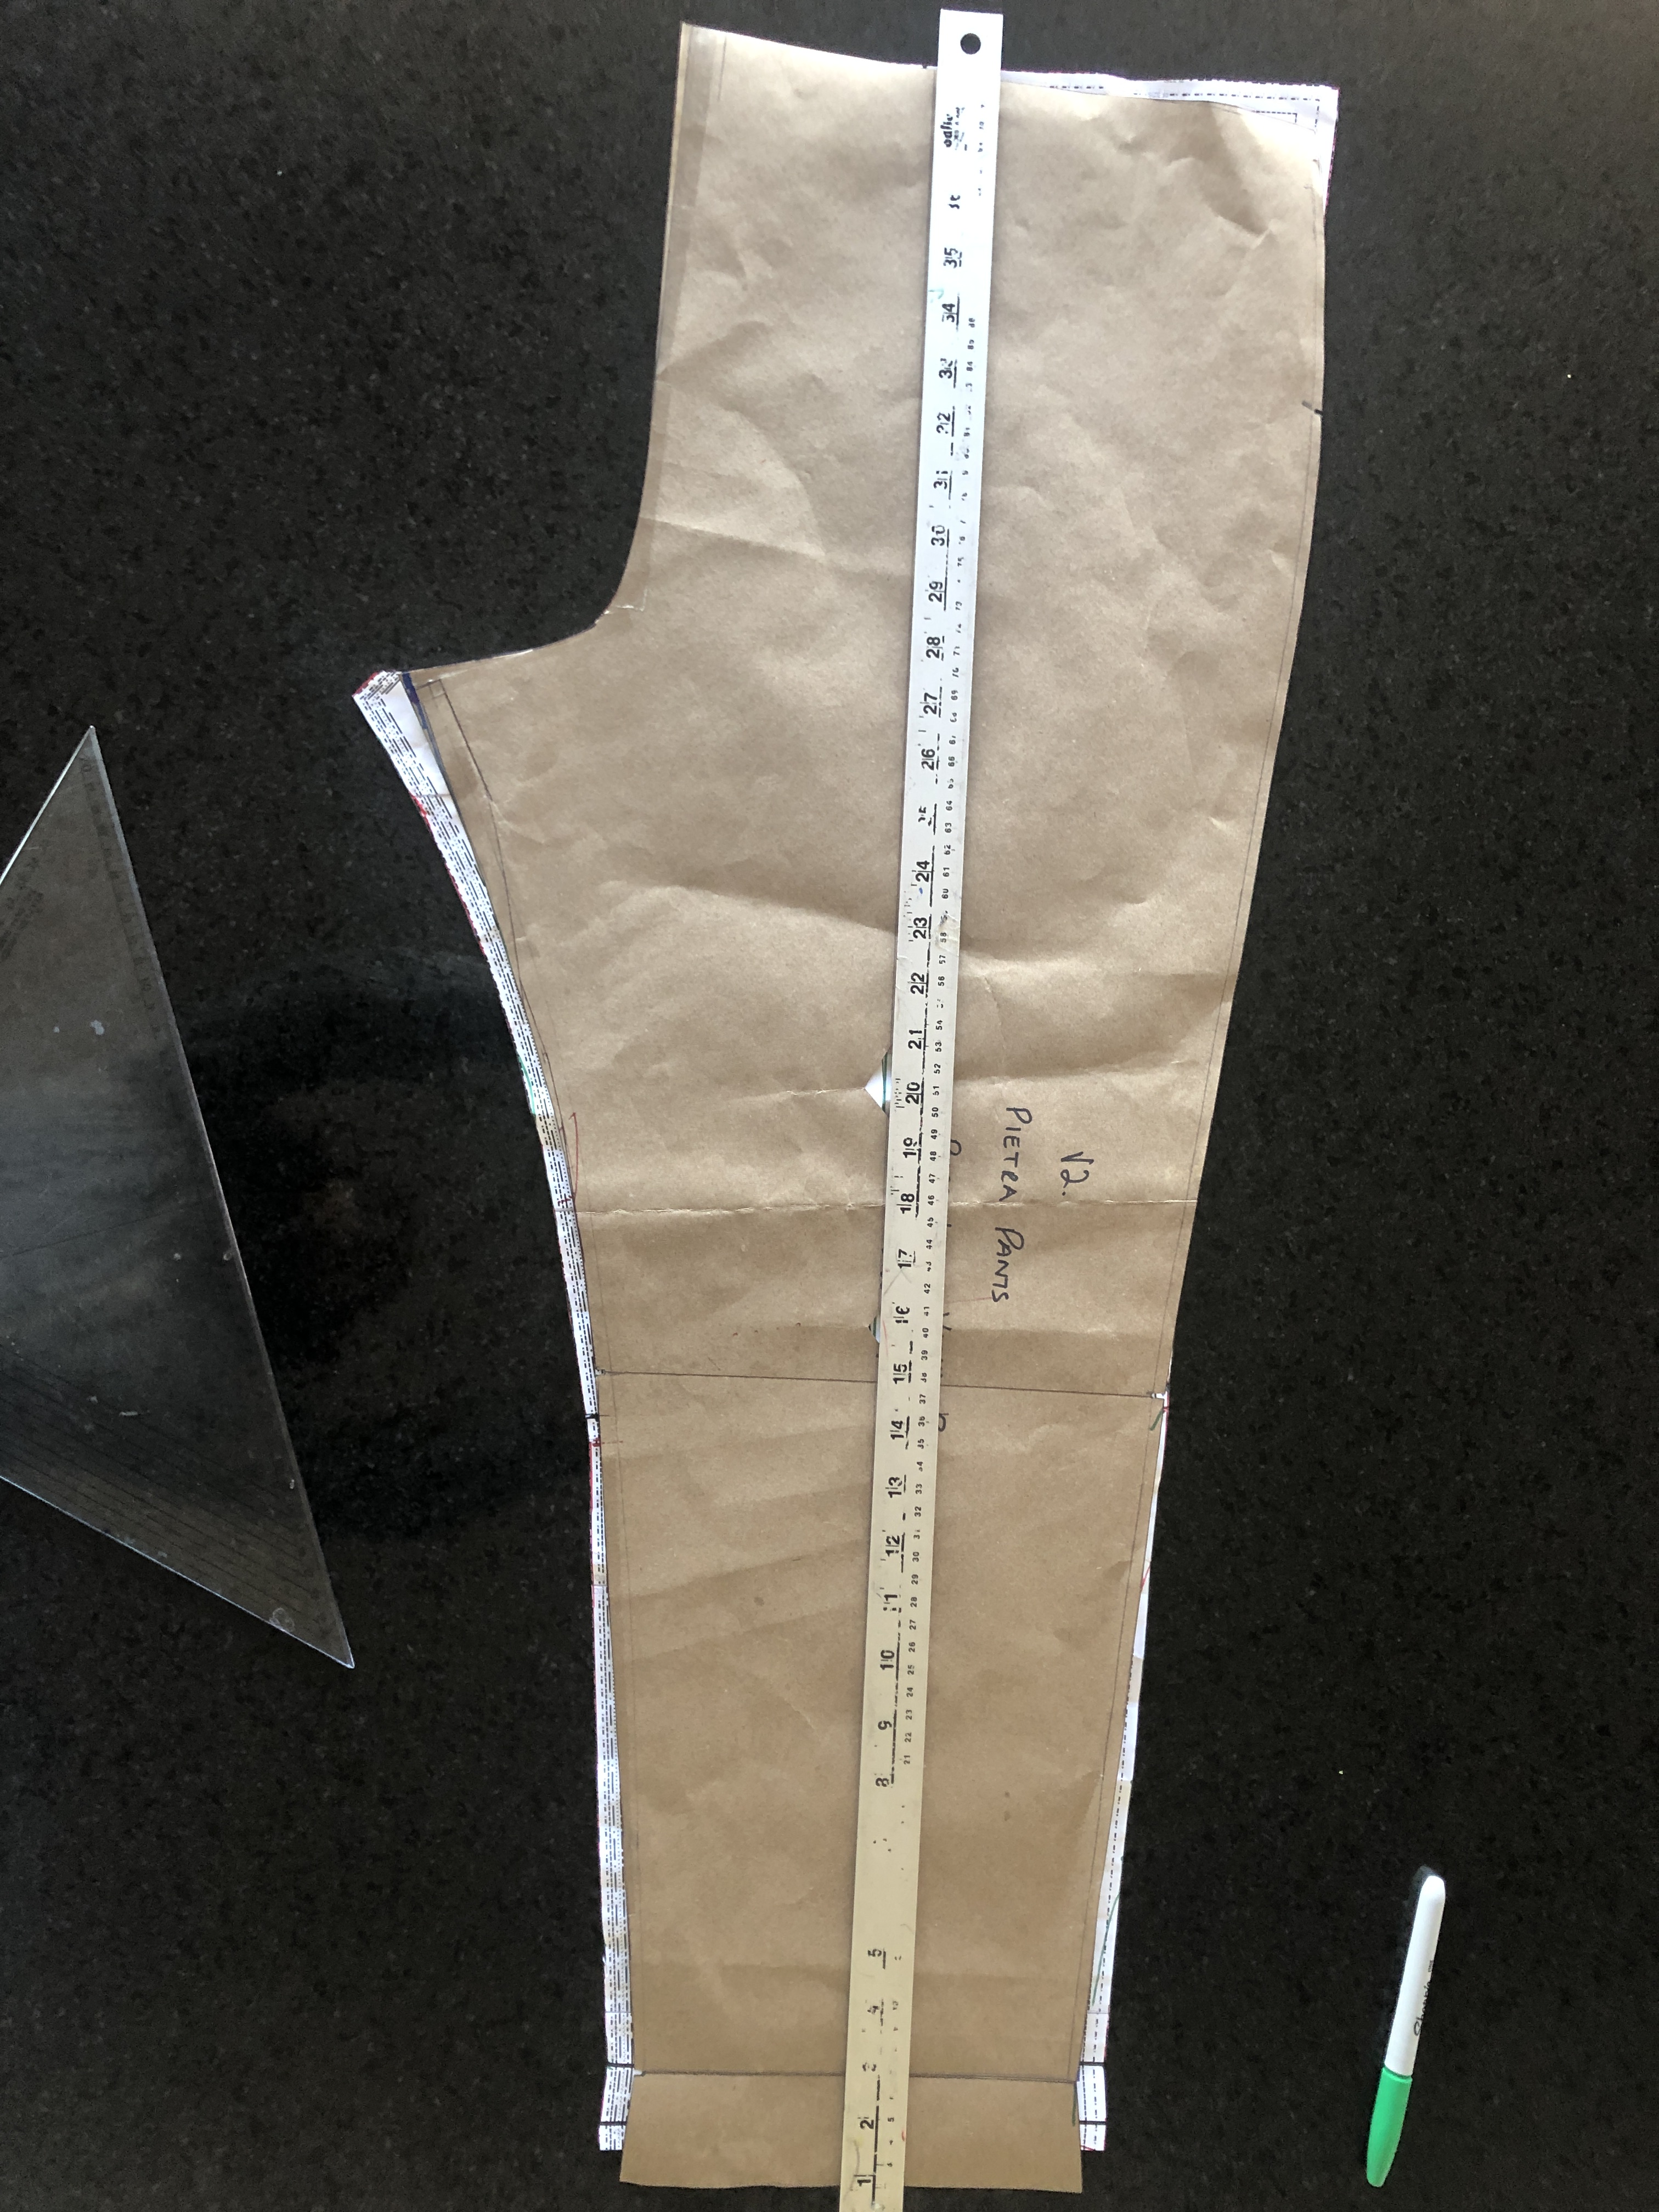
my altered pattern on top (brown), showing differences 
Original pattern (green line) and my altered pattern (red line)

front view, my altered on top 
my finished pant on top of original

Oh my! You did a lot of work to get those pants to fit (sorry, but I laughed at the muslin version) but the finished version fits beautifully and the pants look smart. Ta Da! I hope you will make them again.
LikeLike
That is perfectly fine to laugh 🙂 I am now, but not then ….. I did sew up another two garments with my changes to get them right! it was a lot of work . Thankyou and yes, I will make these again
LikeLike
Thankyou, weather is warming up here in New Zealand and just thinking today about a linen pair 🙂
LikeLike